IN THIS ARTICLE
Using Actor LODs to Optimize Game Performance
You can use levels of detail ( LODs ) to optimize the rendering performance of games. This is especially true for large in-game worlds, which are constrained by hardware, frame rate, and the real-time rendering limits. LODs increase performance and reduce draw calls by displaying progressively less detail in objects that are farther from the camera. To further reduce draw calls, lower LODs have multiple textures combined into one texture.
Using Actor LODs in O3DE
In O3DE, you can use up to six actor LODs. An LOD of 0 has the highest level of detail, and an LOD of 5 the least. Each successive LOD typically has its vertices reduced by 50 percent from the previous level and reduces the number of materials used.
Features
In O3DE, you can use actor LODs on skinned meshes, skeletons, and materials or textures. O3DE performs the following actions:
- Provides a Simple LOD Distance component that supports rendering of different LODs.
- Reads and imports skinned mesh LODs from a single FBX file.
- Auto populates skinned mesh LODs that use a soft naming convention.
Requirements and Limitations
Note the following requirements:
Skinned Meshes
- Each LOD mesh must skin to the same skeleton. However, you can choose which bones to skin to.
Skeletons
- To skin each LOD mesh to a different skeleton, create a separate skeletal hierarchy.
- For each LOD, the skeleton hierarchy must remain the same. Remove leaf bones first and work up the chain.
- In lower LODs, you cannot remove in-between bones. For instance, if you have
Spine1,Spine2andSpine3for anLODof0, you cannot deleteSpine2and leaveSpine1andSpine3.
Materials or Textures
- Each actor requires a separate material group.
- Create a material LOD in the same way that you create a material for static meshes.
Using Digital Content Creation Tools to Create LODs
To author actor LODs in a DCC tool like Autodesk Maya or Autodesk 3ds Max, you can use one of the following two methods:
- Soft naming conventions
- LOD groups
Important:Currently, O3DE supports skeletons created with LOD groups only.
To use the soft naming convention to create LODs
Create an actor with multiple LOD meshes by adding a suffix at the end of the name of each LOD mesh. See the following table for examples.
For more information, see FBX soft naming conventions .
Follow the instructions in Customize FBX asset export with FBX Settings to export the meshes to FBX format so that you can use them in O3DE.
To use LOD groups to create actor LODs
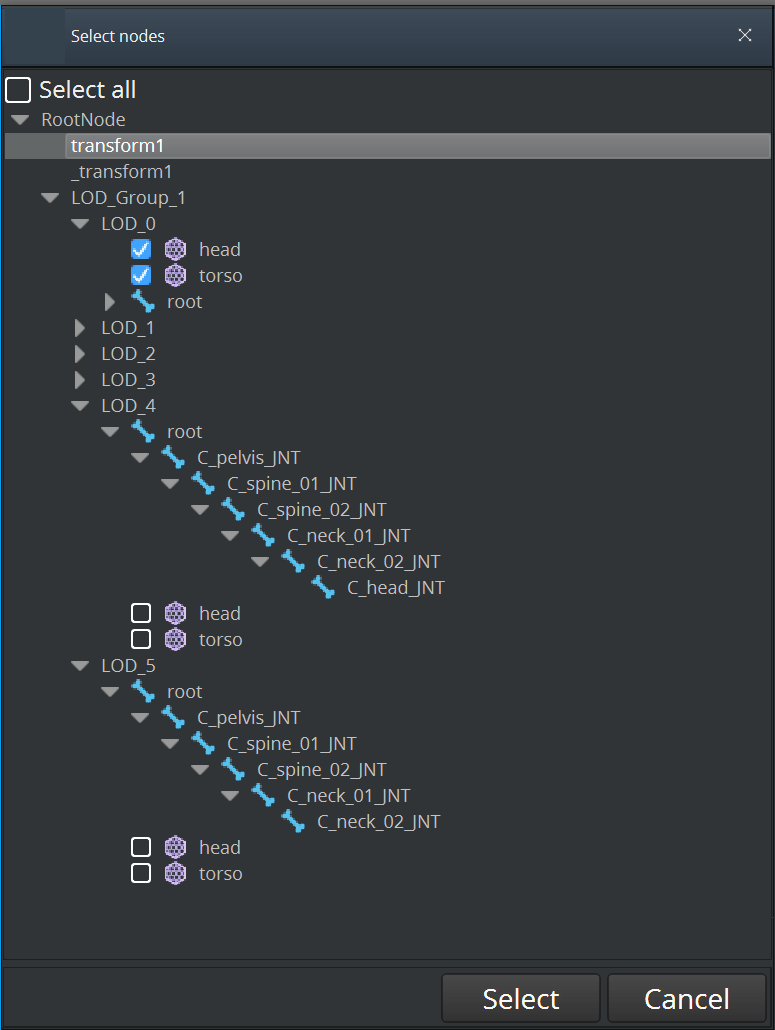
To create an actor with multiple LOD meshes, use an empty LOD group as the parent of the skeleton and the LOD meshes. The following example shows a skeleton created with an LOD group and imported into O3DE.
Using the FBX Settings Tool to Check LODs
After you export your .fbx file to O3DE, do the following:
To use the FBX Settings to check LODs
In O3DE Editor, choose Tools, Asset Browser.
Right click the
.fbxfile and choose Edit Settings. The FBX Settings tool shows a Level of Detail modifier that lists the additional LOD meshes.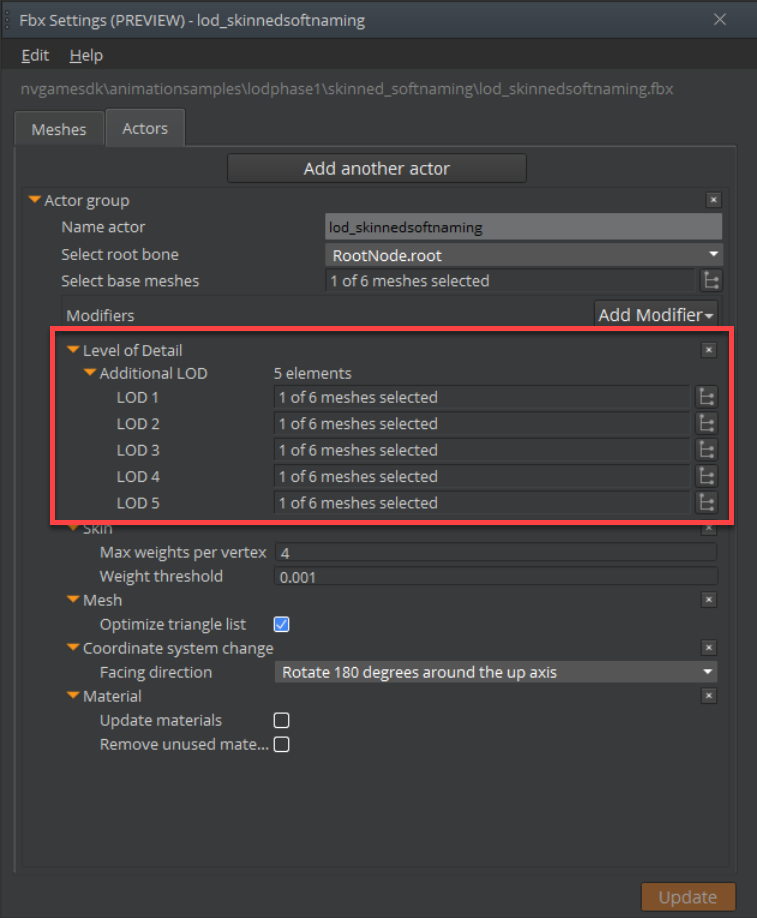
You can use the FBX Settings tool to verify that your LODs were imported correctly. Currently, you can also unselect a mesh or skeleton for each LOD, but you can’t move a mesh or skeleton across a level or add a new mesh or skeleton to a level.
Adding Actor LOD to a Level in O3DE
After you import your LODs into O3DE Editor, you can add an actor LOD to a level.
To add an actor LOD to a level in O3DE
In O3DE Editor, choose Tools, Asset Browser.
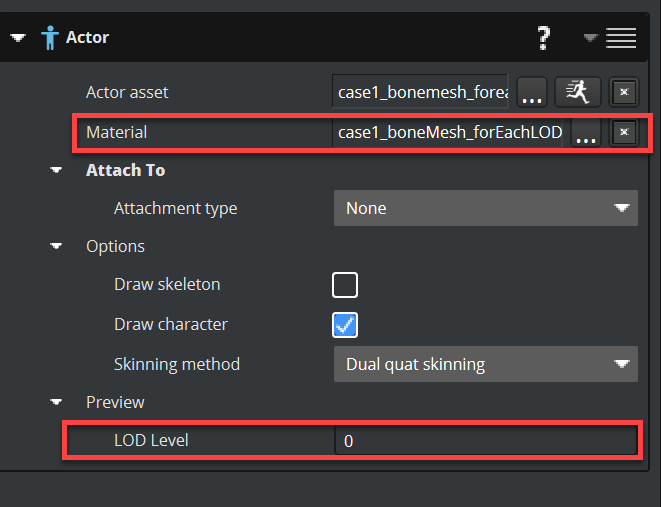
Select and drag the exported
.fbxfile to the viewport. In the Actor component that appears in the Entity Inspector, a shared material file with multiple materials contains the LOD asset.To preview the LODs, change the number for LOD Level in the Actor component.
Notes
- O3DE supports only one material group for each actor.
- Author the material definition (
.mtl) file with all the actor LOD submaterials inside the same.mtlfile. - If you author in Maya, you can assign a different shader for each LOD mesh or use the same shader for all the meshes.
Adding the Simple LOD Distance Component
To enable rendering of levels of detail in O3DE, you must add the Simple LOD Distance component to your level. The Simple LOD Distance component performs a simple LOD distance check. The LOD distance is the distance that the current level of detail must reach before it changes to the next LOD. Each distance must be greater than the previous distance.
To add the Simple LOD Distance component to your level
In O3DE Editor, choose Tools, Entity Inspector.
In Entity Inspector, click Add Component.
In the Animation section, select the Simple LOD Distance component.
Specify an LOD distance or use the default.
In the viewport, zoom out. Notice that the actor mesh changes for each level of detail when the specified LOD distance is reached.