IN THIS ARTICLE
Adding and Removing Gems in a Project
This tutorial shows you how to add and remove Gems in your project by using the Project Manager or the command line interface (CLI) in Open 3D Engine (O3DE). Gems provide features and assets to your project. For more details on Gems and what Gems are available with O3DE, refer to the Gems section.
O3DE includes many Gems that you can add to your project. You can also use Gems from external sources. External Gems must be registered to your project before you can enable them. Refer to Registering Gems for instructions on how to register additional Gems.
Overview
The basic steps to configure Gems for your project are as follows:
(Optional) Register the Gem if it is from an external source.
Locate the Gem you want to enable or disable.
Enable or disable the Gem.
Save changes.
Rebuild your project (if necessary).
Using Project Manager
Opening the Configure Gems screen
Launch Project Manager, which can be found on your desktop or in
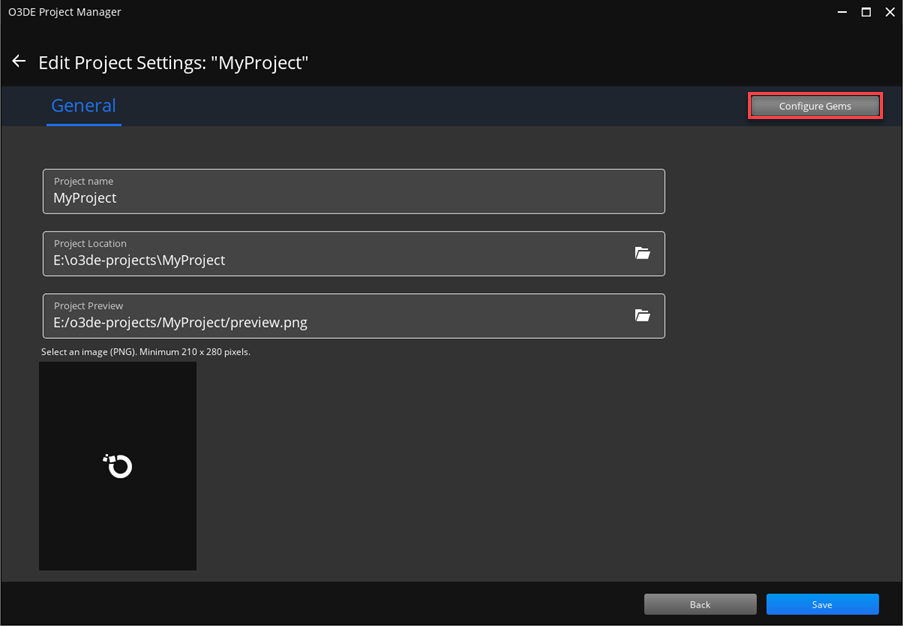
bin/Windows/profile/Default/o3de.exeif you installed O3DE, or in your engine build directory if you built O3DE from source.Open the menu for a project and select the Edit Project Settings… button.
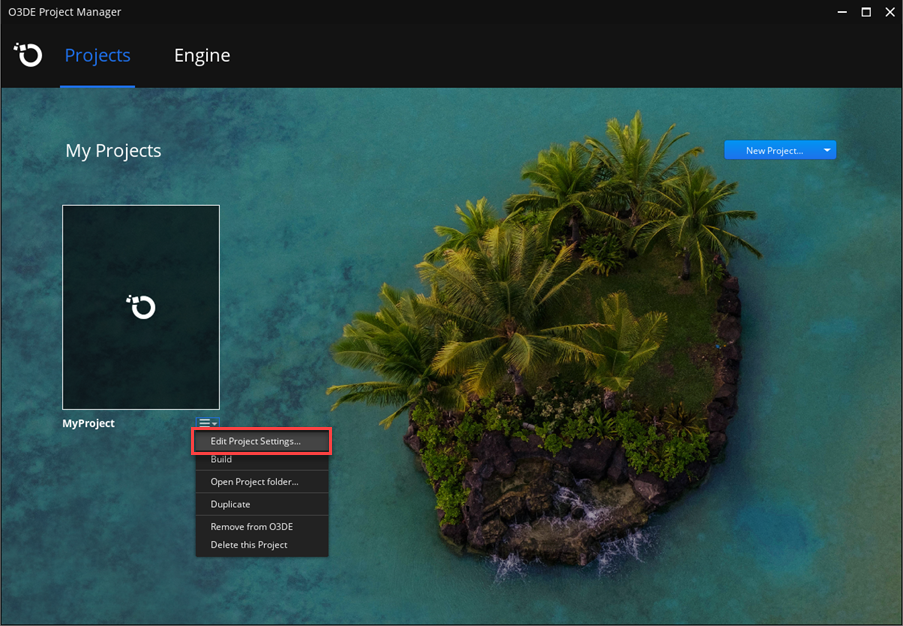
Select the Configure Gems button.
In the Configure Gems screen, you can filter or search for available Gems. Scroll through the resulting list to find the Gem you want to enable or disable for your project.
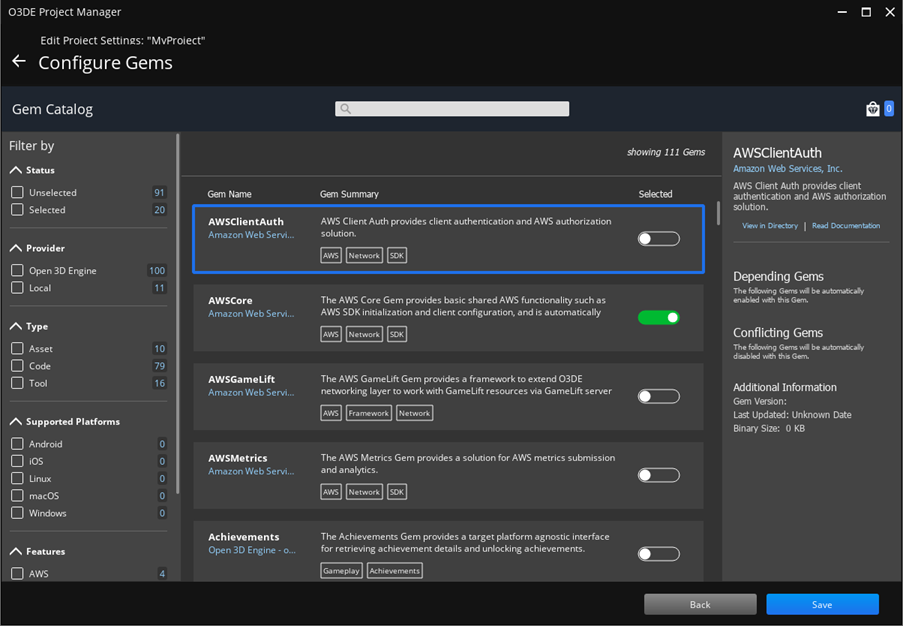
Locating Gems
Filtering the catalog
Filter the Gem catalog to help you find a particular set of Gems.
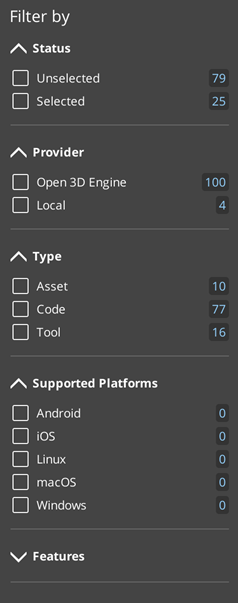
You can filter by the following groups:
| Criteria | Description |
|---|---|
| Status | Displays Gems that are already either selected or unselected for your project. |
| Provider | Displays Gems based on their provider. Open 3D Engine displays Gems that are built with O3DE source. Local displays Gems that are provided by other sources. |
| Type | Displays Gems based on the type of Gem. Asset displays Gems that add assets to your project. Code displays Gems that extend functionality in your project. Tool displays Gems that provide a tool you can use in O3DE. |
| Supported Platforms | Displays Gems based on the platforms that support it. |
| Features | Displays Gems based on its provided features. |
Searching the catalog
Search the Gem catalog by entering text in the search field. You can search for Gems using any of the following search terms:
- Gem name
- Gem display name
- Origin
- Summary
- Features

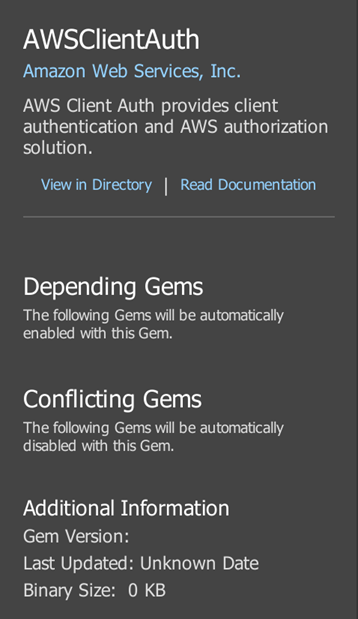
Viewing Gem details
Select a Gem to view its description, other Gems it depends on or conflicts with, and additional information.
Enabling or disabling Gems
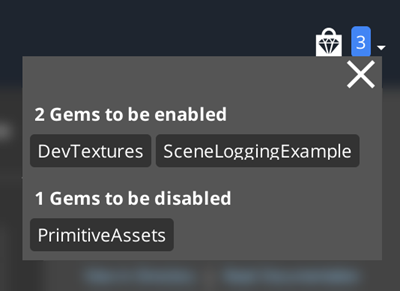
Enable or disable Gems in your project by toggling the switch under the Selected column for a given Gem.

You can enable or disable multiple Gems at once. The changes that will be made to the project are summarized in the top right corner of the window. Select the Gem bag icon to view the Gems to enable or disable. These changes will take effect after you’ve saved and (depending on the Gem requirements) rebuilt your project.
Saving and rebuilding
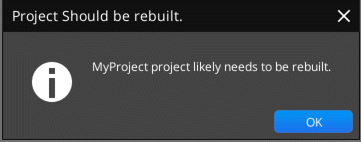
Select the Save button when you are finished adding and removing Gems from your project.
Asset-only Gems do not typically require a rebuild of your project, however Gems that include code do. When you save changes to your project configuration, a warning message will appear if you need to rebuild.
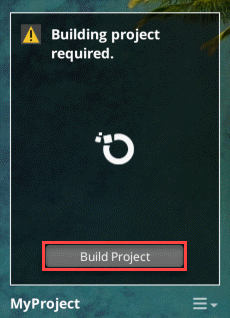
In the Project Manager home screen, select the Build Project button on your project to rebuild it (if necessary).
Using the Command Line Interface (CLI)
You can also configure Gems using the CLI. Refer to CLI Reference for additional supported CLI commands.
Open a command prompt to the folder where your engine is located.
Use the following commands to enable or disable a Gem for a project.
Enable
scripts/o3de enable-gem -gp <gem-path> -pp <project-path>Disable
scripts/o3de disable-gem -gp <gem-path> -pp <project-path>There are several variations of these commands that you can use to specify either the name or the path of the Gem and project.
-gp,--gem-path: Path to the Gem folder (can be absolute or relative).-gn,--gem-name: Name of the Gem, which can be found in the Gem’sgem.jsonconfiguration file.-pp,--project-path: Path to the project folder (can be absolute or relative).-pn,--project-name: Name of the project, which can be found in the project’sproject.jsonconfiguration file.
Rebuild your project. Refer to the Build section for more information about building your project from the command line.