IN THIS ARTICLE
Simulate destruction with NVIDIA Blast
To use NVIDIA Blast assets in O3DE, create an entity, add a Blast Family component, add a Blast Family Mesh Data component, and then assign the blast assets to the components.
Note:To quickly test NIVIDIA Blast simulation, the following steps assume that the assets have been exported from Houdini with Static root disabled in the Blast Export SOP. With Static root disabled, the NVIDIA Blast asset is dynamic, and destruction can be triggered by dropping the entity on a PhysX collision surface such as PhysX Terrain. If Static root is enabled, the root asset is static, and destruction must be triggered by an external force, such as a projectile impact.
For more information, see Create assets for NVIDIA Blast.
Contents
- Create an entity for NVIDIA Blast
- Add automatically processed mesh assets to a NVIDIA Blast entity
- Add manually created mesh assets to a NVIDIA Blast entity
- Test NVIDIA Blast destruction simulation
Create an entity for NVIDIA Blast
When you create an entity, you add the NVIDIA Blast functionality and define how the asset destructs.
To create an entity for NVIDIA Blast
Ensure that the terrain has a PhysX Terrain level component. In Level inspector, choose Add Component and select PhysX Terrain from the component list.
Create a new entity. Right-click in Perspective and choose Create entity from the context menu.
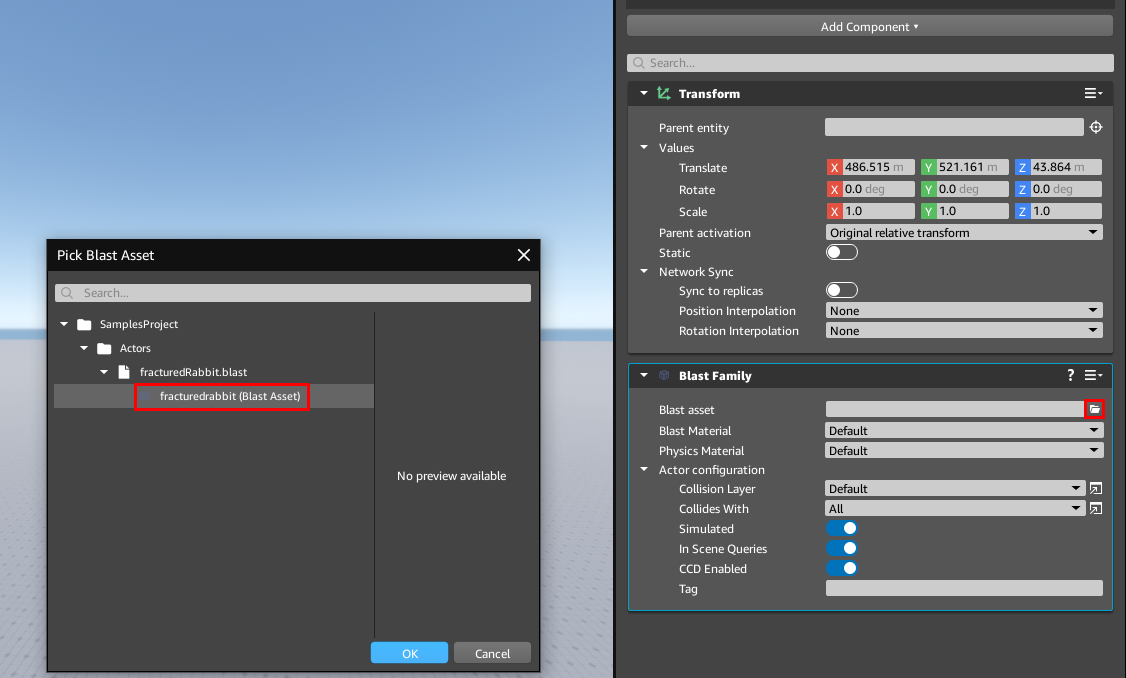
Add a Blast Family component to the entity. In Entity Inspector, choose Add Component and select Blast Family from the component list. The Blast Family component adds NVIDIA Blast functionality to the entity. For more information, see Blast Family component .
Set the Blast asset for the Blast Family component. Click the Folder button to the right of the Blast asset property and choose the
.blastasset in the Blast Asset selection window.
Set the Blast Material for the Blast Family component. Blast materials define how much damage various forces cause to the bonds holding the fractured asset together, and how much damage is required to cause destruction. For more information see Specify destruction properties with Blast materials .
Add a Blast Family Mesh Data component to the entity. In Entity Inspector, Choose Add Component and select Blast Family Mesh Data from the component list. The Blast Family Mesh Data component adds NVIDIA Blast meshes to the entity. For more information, see Blast Family Mesh Data component .
If you have processed your mesh assets with Python Asset Builder, follow the steps in the section: Add automatically processed mesh assets to a NVIDIA Blast entity .
If you have manually edited your mesh assets with FBX Settings, follow the steps in the section: Add manually created mesh assets to a NVIDIA Blast entity .
Add automatically processed mesh assets to a NVIDIA Blast entity
Python Asset Builder creates a blast_slice asset when it processes your NVIDIA Blast assets. The blast slice automatically adds the mesh assets and material to the **Blast Family Mesh Data **component.
To add automatically processed mesh assets
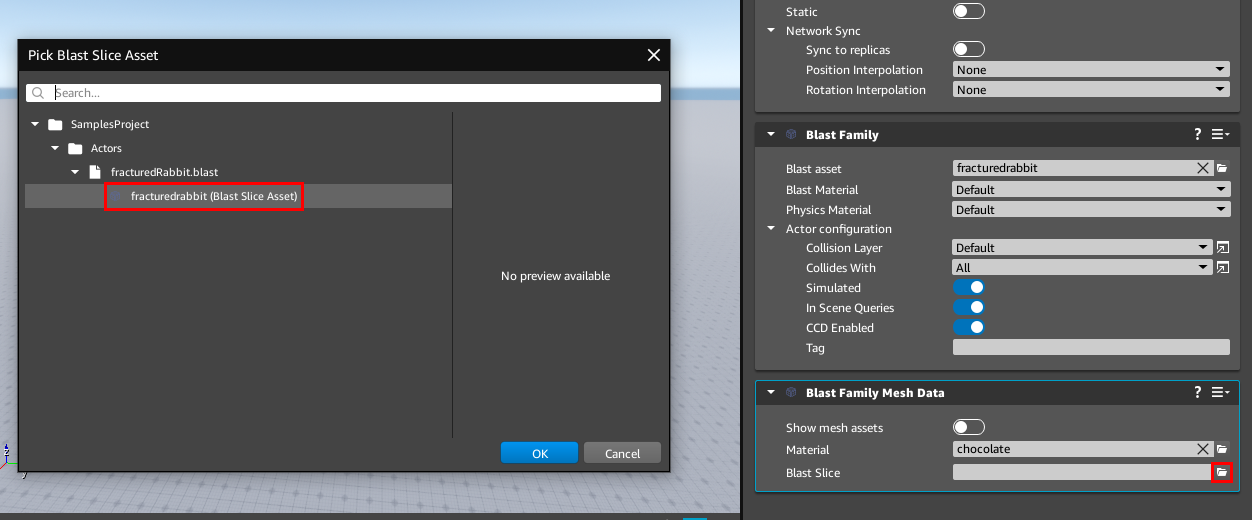
In the Blast Family Mesh Data component, set a material for the Blast mesh. Click the Folder button to the right of the Material property and select a material from the material selection window.
In the Blast Family Mesh Data component, set the Blast Slice property. Click the Folder button to the right of the Blast Slice property and select the asset from the Blast Slice selection window.
Enable the Show mesh assets property if you would like to view the mesh list.
The entity is now set up to simulate destruction. Continue to the section: Test NVIDIA Blast destruction simulation .
Add manually created mesh assets to a NVIDIA Blast entity
If your NVIDIA Blast mesh assets have been manually edited in FBX Settings, use the following steps to add the mesh assets to the entity.
To add manually processed assets
In the Blast Family Mesh Data component, set a material for the Blast mesh. Click the Folder button to the right of the Material property and select a material from the material selection window.
In the Blast family mesh data component, enable the Show mesh assets property to show the mesh asset list.
Add a mesh slot to the list. Choose the + button to the right of Mesh assets to add a mesh slot to the Mesh assets list.
Add a mesh to the list. Click the Folder button to the right of the numbered mesh slot property and select a mesh asset from the Static Mesh selection window.
Repeat steps 3 and 4 until all of the meshes for the blast asset have been added to the Blast family mesh data component.

- The entity is now set up to simulate destruction. Continue to the section: Test NVIDIA Blast destruction simulation .
Test NVIDIA Blast destruction simulation
Because the blast asset has been exported from Houdini with Static root disabled, and a PhysX Terrain level component has been added to the level, destruction can be tested by dropping the object on the terrain.
To test the destruction simulation
With the entity selected, press the 2 key to enable the move tool.
Click and drag on the Z axis of the move gizmo to move the entity several units above the terrain.
Press Ctrl+P to view simulation. The entity drops and shatters when it collides with the terrain.
Press Ctrl+P to end the simulation.