IN THIS ARTICLE
Processing assets for NVIDIA Blast
Blast assets that are exported from Houdini must be processed by Asset Processor to generate run-time assets. There are two methods for processing Blast assets for use in O3DE: an automated method using Python Asset Builder, and a manual method where you select the meshes to be processed.
Important:Processing meshes automatically is less time consuming than manually setting up blast meshes to process. It is important to understand both processes, however. You might use the automatic process for the initial export and then manually edit the mesh assets to add modifiers for custom normals or vertex color streams.
Once you have manually edited the
.fbxasset in FBX Settings, a.assetinfofile is created for the.fbxasset. The.assetinfofile prevents the mesh assets from being processed automatically by Python Asset Builder. Any further changes made to the source.fbxfile, such as adding or removing fracture levels or chunks, must be manually edited in FBX Settings.
Contents
Process Blast assets automatically
When blast assets are processed automatically, a blast slice asset is created that adds the blast mesh chunks to the Blast Family Mesh Data component. If you have a blast asset with dozens of chunks, automatic processing with the Python asset builder for NVIDIA Blast can save some time.
Note:Automatically processing assets for NVIDIA Blast requires that your project has been built with the Python Asset Builder and EditorPythonBindings gems enabled. For more information, see Python Asset Builder gem.
To process Blast assets automatically
Copy the
.blastand.fbxfiles for your Blast asset into an asset directory in your project.Start O3DE Editor. Asset Processor detects the
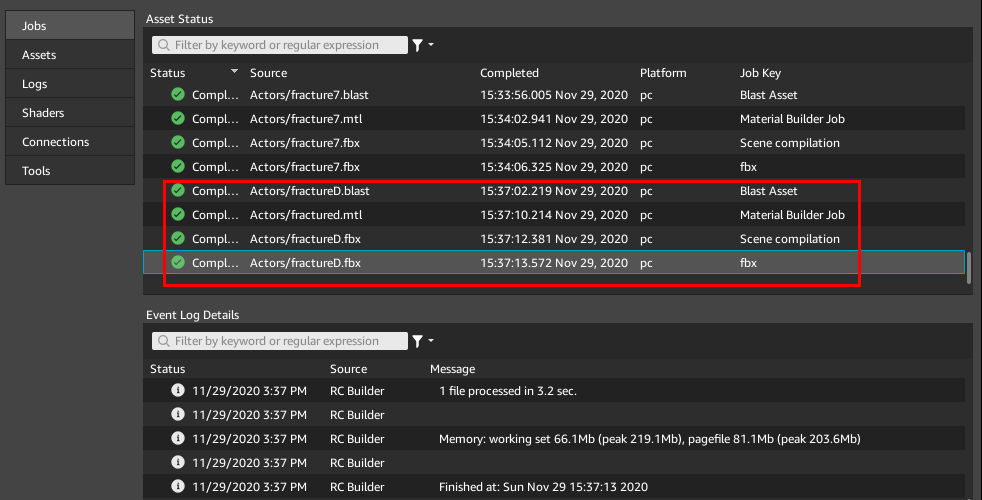
.blastand.fbxfiles and generates the runtime mesh assets, a blast asset, and a blast slice asset.You can verify that the assets have processed successfully in the Jobs tab of Asset Processor. If you need to reprocess the assets, do the following:
In Asset Processor, select the Assets tab.
Right-click the asset in the asset list to open the context menu.
Choose Reprocess File from the context menu.
Process Blast mesh assets manually
Manually processing blast assets requires you to add a mesh group for each chunk mesh so that Asset Processor can generate the run-time asset. Manual processing also requires you to add each run-time mesh to the Blast Family Mesh Data component. If you need to add modifiers to the blast mesh chunks, such as specifying a vertex color stream, you must use this manual process.
To process Blast assets manually
Copy the
.blastand.fbxfiles for your Blast asset into an asset directory in your project.Start O3DE Editor.
Locate the
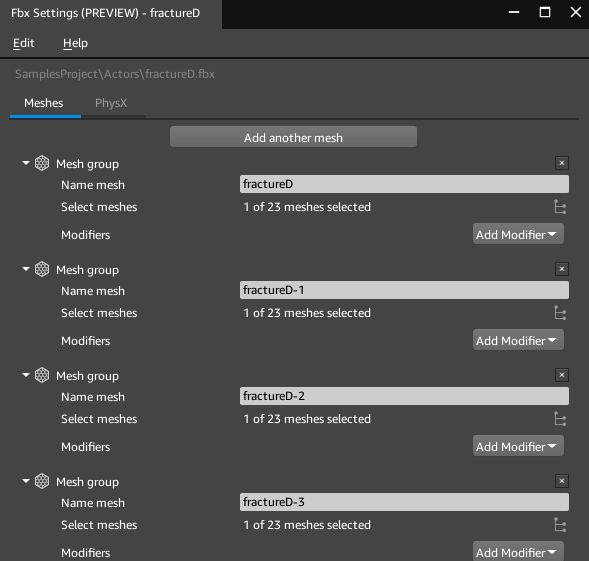
.fbxasset in Asset Browser and double-click on the asset to open FBX Settings.Choose the Meshes tab.
Create one Mesh group for each mesh in the
.fbxasset.If there is an existing Mesh group, ensure it has only the first mesh selected from the Select Meshes list.
Add a new Mesh group by choosing Add another mesh.
Add the next mesh to the new Mesh group by choosing the Hierarchy button to the right of Select meshes and selecting the next mesh from the list.
Repeat steps b and c until each mesh in the mesh list is assigned to its own Mesh group.
Optional: If the meshes require special processing, such as a vertex color stream provided by the Mesh (Advanced) modifier, add modifiers to each mesh group as required.
Choose the Update button in the bottom right of FBX Settings. Asset Processor generates the run-time assets. A File progress window appears and displays feedback about the process.