IN THIS ARTICLE
Create assets for NVIDIA Blast
Assets for NVIDIA Blast are created in Houdini with the provided tools and plug-ins. Follow the steps below to create and export blast assets for O3DE.
Note:These steps can be applied to any mesh. For best results, the mesh should be fully enclosed. Custom normals, UV sets, and vertex color streams can be applied to the root mesh and the resulting chunks.
Contents
Fracture a mesh for NVIDIA Blast
To fracture a mesh
Create an object in Houdini containing a mesh. To avoid potential warnings and errors when runtime assets are generated, ensure you add UV and Normal attributes to the mesh.
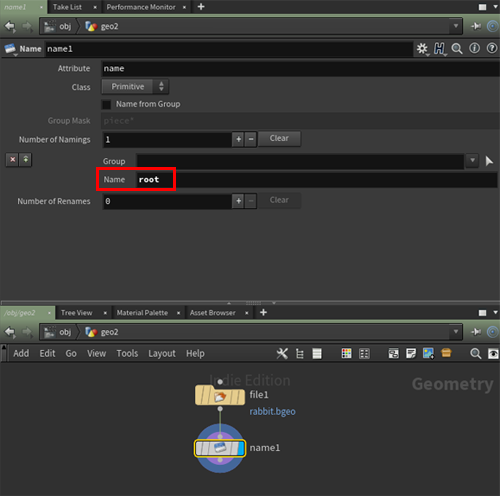
At the SOP level, append a Name SOP to the geometry to be fractured.
In the Name SOP, enter root for the Name parameter. This applies a
nameprimitive attribute to the geometry with the value root so that the root mesh can be identified.
- You can use the Fracture Selection tool to automatically set up a fracture network. Before you continue, it’s important to understand the two Houdini Digital Assets provided by the NVIDIA Blast gem to fracture geometry, Fracture Single and Fracture Hierarchy:
- Fracture Single fractures the provided geometry into a specified number of chunks. Multiple levels of fracture can be created by appending a Fracture Single SOP to already fractured geometry.
- Fracture Hierarchy fractures the provided geometry, and fractures the resulting chunks for each additional level specified by the Fracture levels parameter. If you specify 2 Fracture levels and 10 Fractures per level, the root geometry is fractured into ten chunks and each chunk is fractured into ten chunks.
Caution:The number of chunks generated by Fracture Hierarchy grows exponentially. Setting the Fracture levels and Fractures per level too high can generate assets that are too large to load and simulate with NVIDIA Blast. For fine control over multiple fracture levels, use multiple Fracture Single SOPs.
Note:Both Fracture Single and Fracture Hierarchy Houdini Digital Assets (HDAs) are created with standard Houdini SOPs. You can open these HDAs to view their network contents and use them as the basis for custom fracture SOPs for your projects.
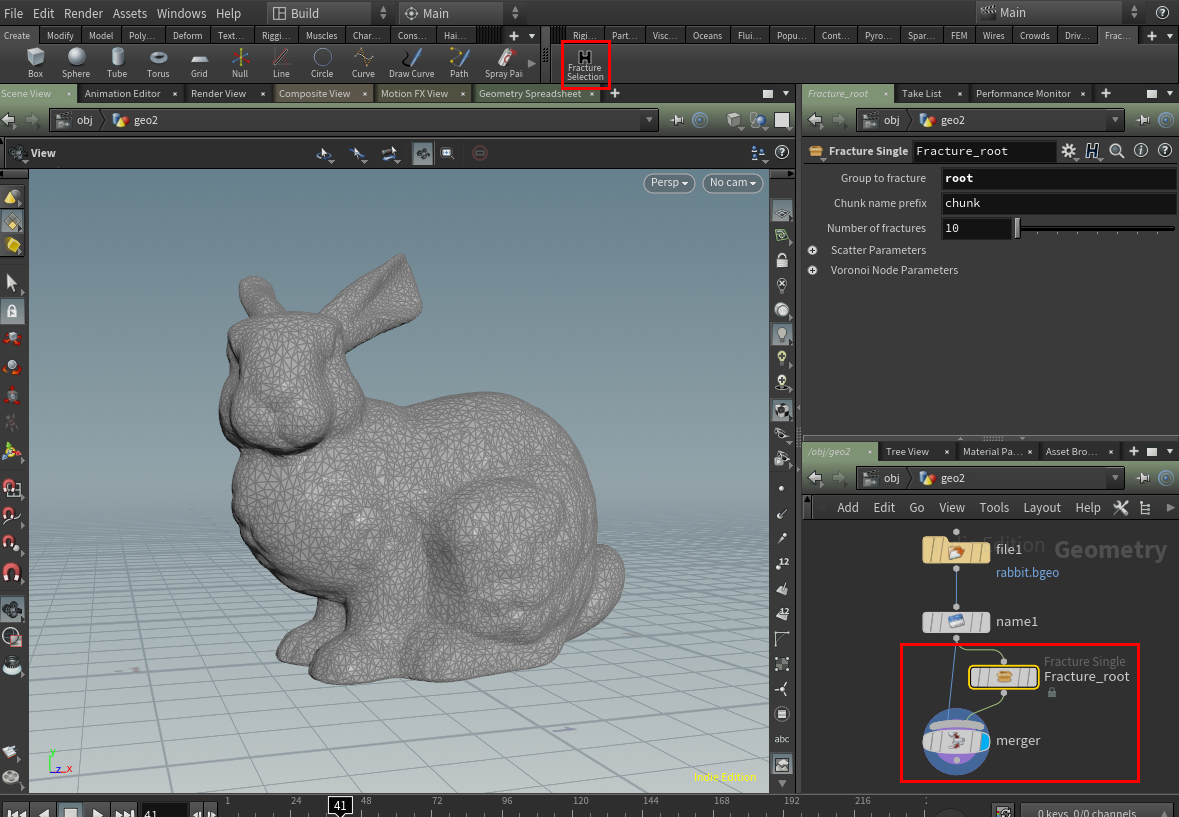
The provided Fracture Selection tool adds a Fracture Single SOP and feeds the root mesh and the resulting chunks from the fracture operation into a Merge SOP.
With the Name SOP selected, choose Fracture Selection from the Fracture tools for Blast shelf. A Fracture Single SOP is appended to the network and input into a Merge SOP along with the root mesh. Note that the Fracture Single SOP specifies root as the Group to fracture and chunk as the Chunk name prefix.
To visualize the fracture:
Ensure the Display flag is enabled on the Merge SOP.
Choose the Display groups and attribute list toggle from the Display options toolbar to the right of the Perspective viewport. This enables the groups and attributes overlay in the Perspective viewport.
In the groups and attributes overlay, choose the Gear button to open the list options.
In the list options, choose Attributes and select name to visualize the geometry by its name attribute. You can see the hierarchy of geometry in the list, and the mesh chunks are colored by their name primitive attribute in the perspective viewport.
Note:With Houdini’s geometry select mode set to primitive, you can press the S key to enter select mode and click on any chunk, at any level, in the groups and attributes overlay, to select that chunk and its descendants.

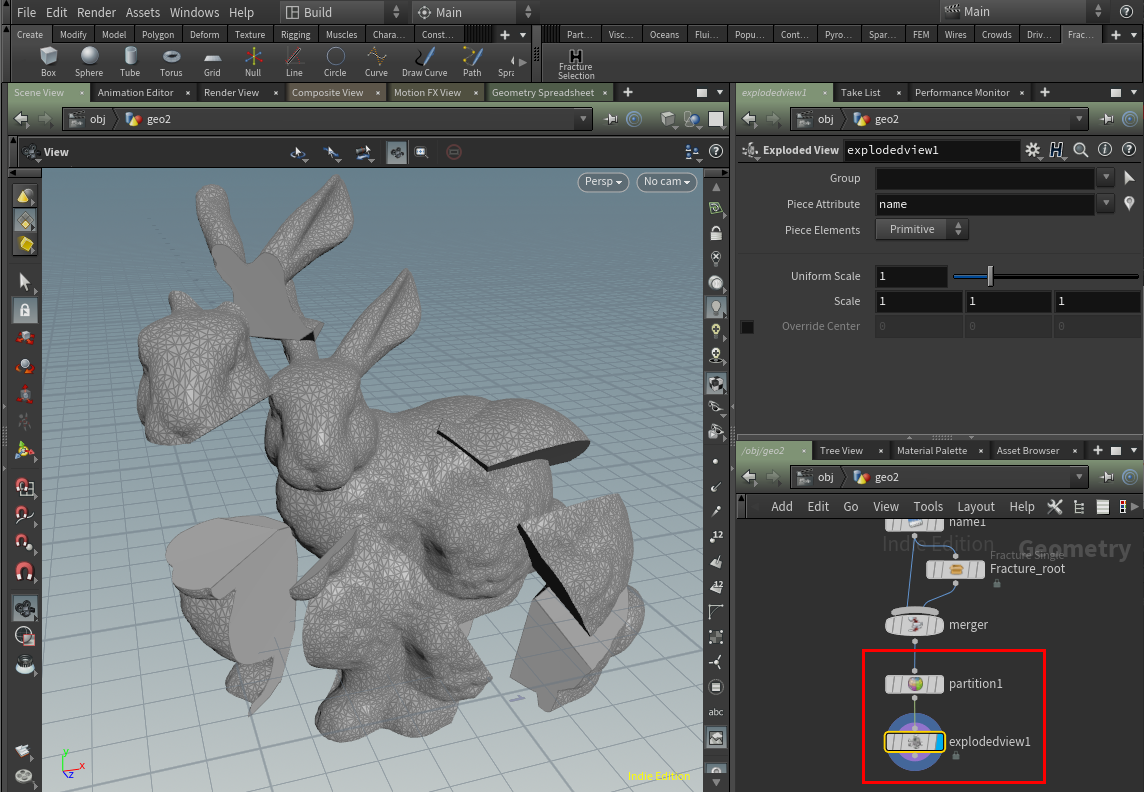
It might be difficult to see where the mesh is fractured if the root geometry is complex. You can use Exploded View to better inspect the fracture result. To see an exploded view of the fractured mesh:
Append a Partition SOP to the Merge SOP.
Append an Exploded View SOP to the Partition SOP.
Enable the Display flag on the Exploded View SOP.
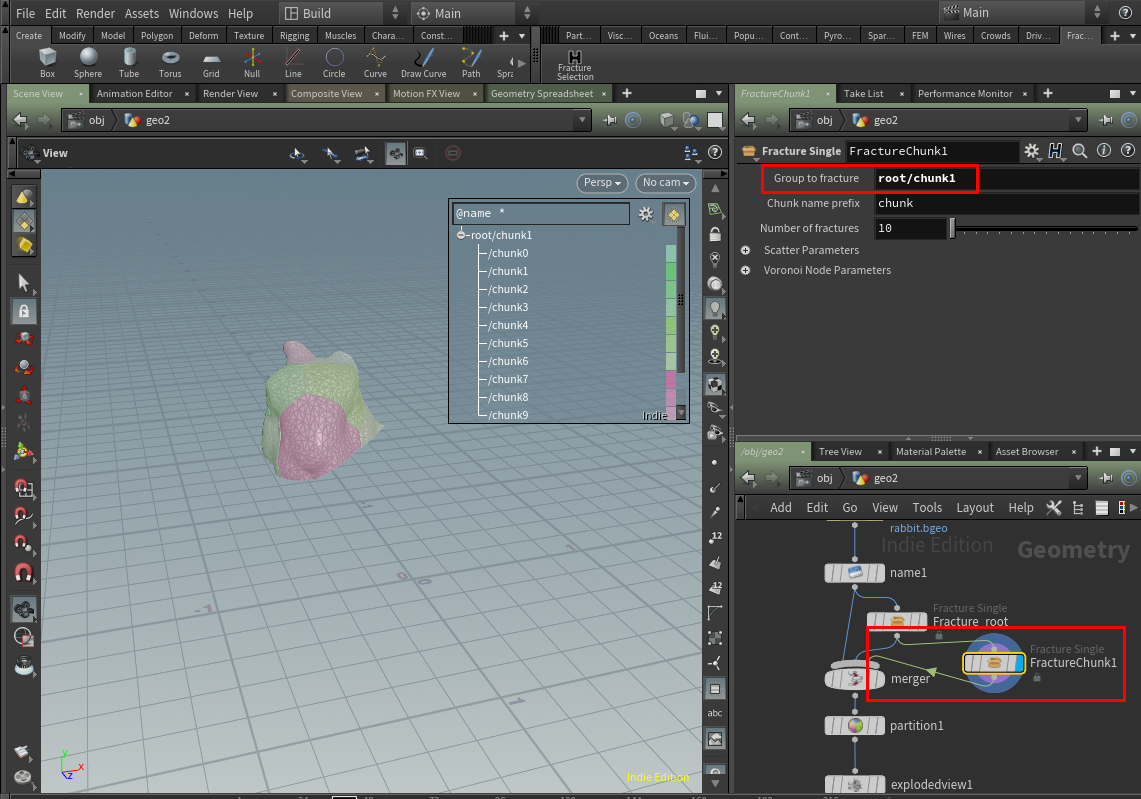
Fractures can be hierarchical, that is, a fracture chunk can be further fractured. To add an additional fracture level:
Add a Fracture Single SOP to the network.
Connect the output of the Fracture_root SOP to the input of the newly added Fracture Single SOP.
Connect the output of the newly added Fracture Single SOP to the input of the Merge SOP.
In the Fracture Single SOP, specify a chunk to fracture. In the example below, chunk1 (the rabbit’s face) is specified in the Group to fracture parameter using the path root/chunk1.
Export an asset for NVIDIA Blast
With the mesh fractured, you must export .fbx and .blast assets to be processed by Asset Processor for use in Open 3D Engine.
To export an asset
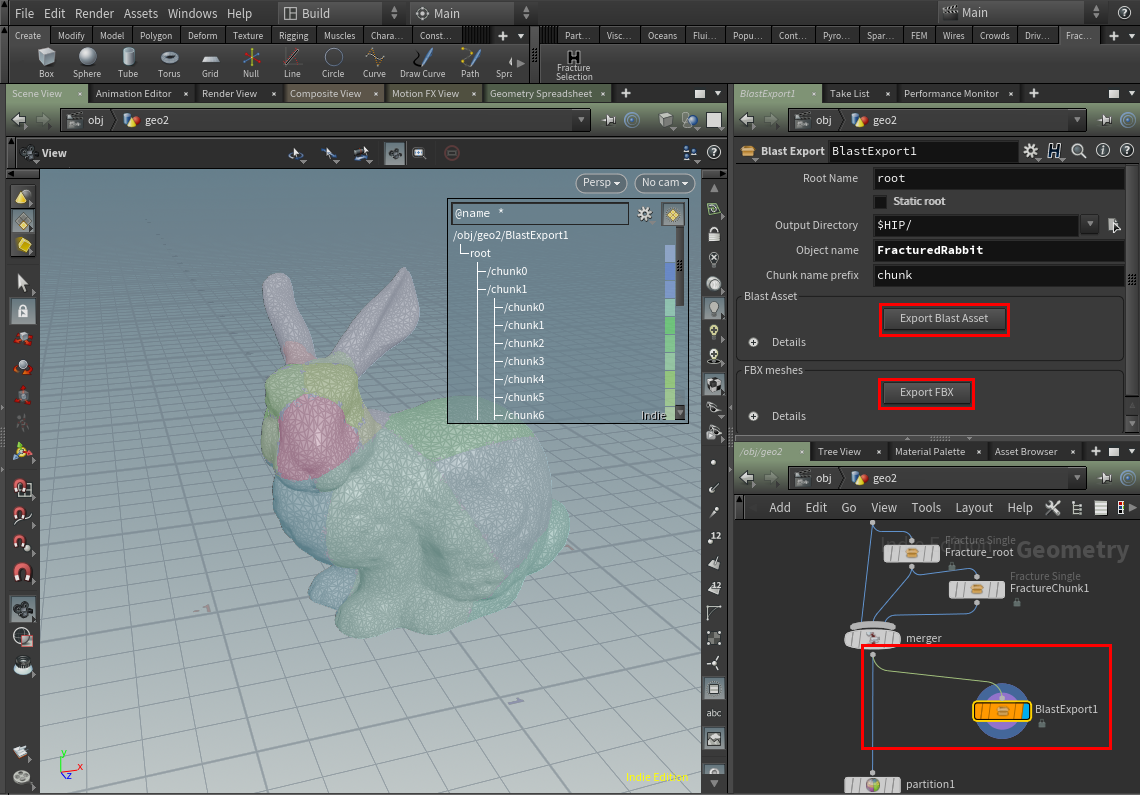
Add a Blast Export SOP to the network.
Connect the output of the Merge SOP to the input of the Blast Export SOP.
Ensure the Root Name and Chunk name prefix parameters are properly set.
Set the Object name parameter to the desired name. The exported
.fbxand.blastfiles are named by this parameter’s value.Set the Output Directory parameter. By default, the
.fbxand.blastfiles are exported to the directory where the Houdini scene file is saved.Disable the Static root parameter.
- If the Static root parameter is enabled, the root mesh is a static rigid body and unaffected by gravity. Sufficient force fractures the root mesh and the chunks are dynamically simulated.
- If the Static root parameter is disabled, the root mesh is dynamic, treated like a rigid body, and affected by gravity. Sufficient force fractures the root mesh and the chunks are dynamically simulated.
Note:All chunks are simulated as dynamic rigid bodies. You can make non-root chunks into static rigid bodies by adding the word static to the name primitive attribute of the non-root chunk. This is useful for scenarios where you want to destroy part of an entity while leaving part of the entity in place.
For more information, see Partial destruction with NVIDIA Blast.
Choose Export Blast Asset to generate a
.blastasset.Choose Export FBX to generate a
.fbxasset.