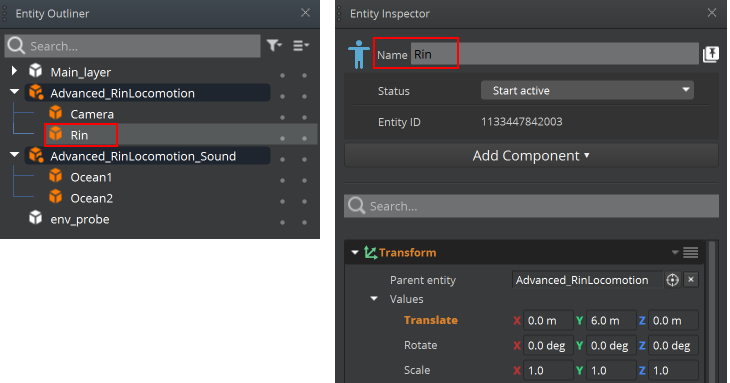
Entity Inspector
The Entity Inspector manages all the components for each entity. Select an entity in the Entity Outliner or the viewport to see the attached components in the Entity Inspector.
To open the Entity Inspector
In O3DE Editor, choose Tools, Entity Inspector.
Select an entity in the viewport or the Entity Outliner.
In the Entity Inspector, you can see the following:
- Name - Name of the entity. You can enter a different name for the entity.
- Entity Icon - Customizable icon to help you recognize entities in the viewport.
- Status - Active status of the entity. When the level starts, the entity can be active, inactive, or active but only in editor mode.
- Entity ID - If this entity ID is called out in messages, errors, or asserts, you can find the entity by searching for it in the Entity Outliner.
- Components attached to the entity appear below.
Use the Entity Inspector to do the following:
- Add components to entities
- Modify component properties
- Remove, copy, cut, and paste components
- Set the entity status
- Customize the entity icon
- Pin an entity’s inspector
- Create your own help topic for your custom component
Note:For a list and descriptions of available components, see Component Reference. You can also click the Help icon in the header of each component to open a help topic.