IN THIS ARTICLE
Get Started with Material Types and Shaders
In this tutorial, you will create a new material type with a simple, unlit color shader. This tutorial covers the following key concepts:
- Files needed for creating materials and shaders.
- Basic shader programming concepts in AZSL, including Shader Resource Groups.
- Creating shader asset files.
- Creating a material types and attaching shaders.
- Debugging shaders with Asset Processor.
1. Set up the files
The process of developing a combination of shaders and materials that create an appearance for a surface is called look development. For Atom renderer, this process requires several interdependent files including the following:
.azsl: This file contains AZSL shader code. The AZSL shader code includes Shader Resource Groups, shader inputs and outputs, and shader programs..shader: This file contains data that describes the shader asset and is structured in JSON format. It references the.azslfile and configures the AZSLc shader compiler..materialtype: This file contains material type data, and is structured in JSON format. A material type references one or more.shaderfiles to create an appearance, defines properties for the material type, and links the material type properties to variables in the referenced shaders..material: This file contains material data and is structured in JSON format. Materials must be created from a material type. Materials inherit the material type’s properties and shaders. These properties' values are set in the.materialfile, describing the look of the material. Materials can be created using the Material Editor.
Asset Processor compiles run-time assets from these files. When a new asset file is saved to disk, or an existing asset file is modified, Asset Processor automatically detects the change and processes the files. For Asset Processor to detect new or updated files, the files must exist in a subdirectory of your project, or in a directory Asset Processor is monitoring. For this tutorial, use a project subdirectory named Materials.
Note:To specify a directory outside of your project for Asset Processor to monitor, you can edit the
AssetProcessorPlatformConfig.inilocated in the root of your project directory.Assets such as shaders and materials can be distributed in Gems. Check the Gems included with your project for additional material and shader asset files.
In the Materials subdirectory of your project, create the following files:
MyUnlitColor.azslMyUnlitColor.shaderMyUnlitColor.materialtype
Note:The.materialfile is created using Material Editor later in the tutorial.
2. Author AZSL Shader Code (.azsl)
First, you are going to write AZSL shader code in the MyUnlitColor.azsl file. The AZSL shader contains the following components:
- #include directives
- Shader Resource Groups (SRGs)
- Vertex and fragment shader inputs and outputs
- Vertex and fragment shader programs
Includes
At the very top of the file are a set of #include directives. A shader program can use shared Shader Resource Groups (SRGs) and reusable AZSL code, which are contained in .srgi and .azsli files.
For this tutorial, you need the following #include directives:
viewsrg.srgi: Defines a shared view SRG.DefaultObjectSrg.azsli: Defines an object SRG.ForwardPassOutput.azsli: Defines a ForwardPassOutput struct.SrgSemantics.azsl: Defines SRG semantics. Anytime you want to define an SRG, the SRG must inherit from an SRG semantic.
To use #include directives, add the following code in the MyUnlitColor.azsl file:
#include <viewsrg.srgi>
#include <Atom/Features/PBR/DefaultObjectSrg.azsli>
#include <Atom/Features/PBR/ForwardPassOutput.azsli>
#include <Atom/Features/SrgSemantics.azsli>
Next, you will learn about these referenced SRGs: what they are, how they are used throughout your shader code, and how to define a new SRG.
Shader Resource Groups
Throughout a shader program, you need to store, use, and pass constant data. In AZSL, this is handled through Shader Resource Groups (SRGs). SRGs contain shader resources and uniforms that can be shared throughout the system. SRGs are bound to a specific frequency (such as per frame view, per object, per material, and more). They are designed to be shared across multiple shaders, so a single material type can only define one material SRG.
In this tutorial, MyUnlitColor.azsl uses the following SRGs:
- ViewSrg: This is provided by viewsrg.srgi. ViewSrg contains data related to the camera changes (such as view, projection, inverse viewProjection matrices, and culling frustum).
- ObjectSrg: This is provided by DefaultObjectSrg.azsli. ObjectSrg contains data that is specific for the object or geometry being rendered (such as the object’s position).
- MaterialSrg: This is defined in this .azsl file and contains data that is specific to the material type.
Defining a Material SRG
Next, you need to define a material SRG to store data that needs to be updated at a per-material frequency. A material SRG must inherit an SRG_PerMaterial semantic. SRG_PerMaterial contains data specific to the material. In this tutorial, you want to configure a single color of the material, so the material SRG must contain a variable to hold the color value.
As shown in the following code, define an SRG, UnlitColorSrg that inherits from SRG_PerMaterial. Then, define variable m_unlitColor that will hold a color value.
ShaderResourceGroup UnlitColorSrg : SRG_PerMaterial
{
    float3 m_unlitColor;
}
Note:TheMyUnlitColor.materialtypefile must establish a connection betweenm_unlitColorand the color property. You will do this later in the tutorial.
Next, you’re going to write the vertex and fragment shaders that use these SRGs.
Defining Vertex and Fragment Shaders
In this step Shaders are only one part of the render pipeline – they must have inputs and outputs to pass constant data and communicate with the rest of the pipeline. Writing shader programs in AZSL follows similar practices as in HLSL (see Microsoft DirectX HLSL documentation ).
Shader inputs and outputs can be defined via input/output variables or via a structure containing them.
- Vertex Shader
- To set up the vertex shader, define the input and output data of the vertex shader and the vertex shader program.
The vertex shader inputs and outputs are defined inside the structs VertexInput and VertexShaderOutput. The type of input and output is indicated by HLSL semantics (see Microsoft DirectX HLSL - Semantics](https://docs.microsoft.com/en-us/windows/win32/direct3dhlsl/dx-graphics-hlsl-semantics) documentation).
In this vertex shader program, you need the geometry’s position. You can set up vertex input and output using the following code:
struct VertexInput
{
    float3 m_position : POSITION;
};

struct VertexShaderOutput
{
    float4 m_position : SV_Position;
};
The vertex shader program entry point is defined in the function MainVS. In this tutorial, you are creating a simple vertex shader that transforms the object’s position from model space to clip space by applying a series of matrix transformations.
Your vertex shader program should look like this:
VertexShaderOutput MainVS(VertexInput IN)
{
    VertexShaderOutput OUT;
    float3 worldPosition = mul(ObjectSrg::GetWorldMatrix(), float4(IN.m_position, 1)).xyz;
    OUT.m_position = mul(ViewSrg::m_viewProjectionMatrix, float4(worldPosition, 1.0));
    return OUT;
}
- Fragment Shader
- Next, set up the fragment input and output, and the fragment shader program.
The fragment shader program entry point is defined in the function MainPS. It takes VertexShaderOutput as input. The resulting fragment shader outputs are stored in the ForwardPassOutput struct (included in ForwardPassOutput.azsli).
Since this is an unlit single shader color, you only need to set the value for diffuse color and disable specular lighting.
Your fragment shader program should look like this:
ForwardPassOutput MainPS(VertexShaderOutput IN)
{
    ForwardPassOutput OUT;

    // standard ForwardPassOutput G-buffer layout
    OUT.m_diffuseColor = float4(UnlitColorSrg::m_unlitColor, -1.0); // Subsurface scattering is disabled
    OUT.m_specularColor = float4(0.0, 0.0, 0.0, 0.0);   // Disable specular lighting

    return OUT;
}
MyUnlitColor.azsl
Here is the complete MyUnlitColor.azsl file:
#include <viewsrg.srgi>
#include <Atom/Features/PBR/DefaultObjectSrg.azsli>
#include <Atom/Features/PBR/ForwardPassOutput.azsli>
#include <Atom/Features/SrgSemantics.azsli>

ShaderResourceGroup UnlitColorSrg : SRG_PerMaterial
{
    float3 m_unlitColor;
}

struct VertexInput
{
    float3 m_position : POSITION;
};

struct VertexShaderOutput
{
    float4 m_position : SV_Position;
};

VertexShaderOutput MainVS(VertexInput IN)
{
    VertexShaderOutput OUT;
    float3 worldPosition = mul(ObjectSrg::GetWorldMatrix(), float4(IN.m_position, 1)).xyz;
    OUT.m_position = mul(ViewSrg::m_viewProjectionMatrix, float4(worldPosition, 1.0));
    return OUT;
}

struct PixelOutput
{
    float4 m_color : SV_Target0;
};

ForwardPassOutput MainPS(VertexShaderOutput IN)
{
    ForwardPassOutput OUT;

    // standard ForwardPassOutput G-buffer layout
    OUT.m_diffuseColor = float4(UnlitColorSrg::m_unlitColor, -1.0); // Subsurface scattering is disabled
    OUT.m_specularColor = float4(0.0, 0.0, 0.0, 0.0);   // Disable specular lighting

    return OUT;
}
3. Author Shader Asset Data (.shader)
The .shader file defines metadata to configure the shader compiler for the referenced .azsl source file, and specifies how the render pipeline should use the shader. The .shader file is responsible for the following:
- Referencing the
.azslsource file. - Configuring depth, stencil, and blend states.
- Specifying shader compiler hints.
- Specifying entry points to the vertex and fragment shader programs.
- Specifying where in the render queue this shader should be drawn.
Components of .shader
The configuration in .shader is broken down into the following properties:
- Source
- This shader references the
.azslsource fileMyUnlitColor.azsl. - DepthStencilState
- The
CompareFuncproperty sets the comparison operator toGreaterEqualin order to discard pixels that have depth values that are lower than the current value in the depth buffer. This is necessary because Atom implements reverse depth buffers and uses a separate depth pre-pass that runs before the lighting pass. - BlendState
- Disable the blend state.
- CompilerHints
- Set compiler hints for AZSLc.
- Entry Points
- By default, any functions that start or end with
VSorPS(corresponding to vertex and fragment shaders) are recognized by the asset builder as shader entry points. To explicitly identify the shader’s entry points, specify the function’s name and the type of shader program.
- The vertex shader’s entry point is at the MainVS function.
- The fragment shader’s entry point is at the MainPS function.
- DrawList
- Specify the name of the draw list where draw items using this shader should be queued for rendering. Generally, the name should match the draw list name in a
.pass.
MyUnlitColor.shader
Here is the complete MyUnlitColor.shader file:
{
    "Source" : "MyUnlitColor.azsl",

    "DepthStencilState" :
    {
        "Depth" :
        {
            "Enable" : true,
            "CompareFunc" : "GreaterEqual"
        }
    },

    "BlendState" : {
        "Enable" : false
    },

    "CompilerHints" : {
        "DxcDisableOptimizations" : false
    },

    "ProgramSettings":
    {
      "EntryPoints":
      [
        {
          "name": "MainVS",
          "type": "Vertex"
        },
        {
          "name": "MainPS",
          "type": "Fragment"
        }
      ]
    },

    "DrawList" : "forward"
}
4. Author Material Type Data (.materialtype)
The MyUnlitColor.materialtype file contains the material type data in JSON format. Material types are responsible for the following:
- Linking to shaders.
- Defining property groups
- Defining material properties for property groups.
Linking to Shaders
Linking to shaders in a .materialtype defines which shader(s) the material type will use to compute the appearance of the surface. It also exposes the variables of the shader(s) to the material type, so they can be linked to material properties. In this tutorial, the color property is connected to the variable m_unlitColor, which is defined inside MyUnlitColor.azsl and referenced by the MyUnlitColor.shader file.
For this tutorial, the MyUnlitColor material type links to a few shaders:
MyUnlitColor.shader: This is the the shader you created earlier in this tutorial. The color property is connected to the variablem_unlitColor, which is defined insideMyUnlitColor.azsland referenced by theMyUnlitColor.shaderfile.DepthPass.shader: This shader is needed to write to the depth buffer.Shadowmap.shader: This shader enables the object to cast a shadow.
Note:DepthPass.shaderandShadowmap.shaderare common shaders provided by Atom.
This results in the following example:
"shaders": [
        {
            "file": "./MyUnlitColor.shader"
        },
        {
            "file": "Shaders/Depth/DepthPass.shader"
        },
        {
            "file": "Shaders/Shadow/Shadowmap.shader"
        }
]
Defining Material Properties
In a .materialtype file, material properties are defined in groups of properties within the propertyLayout container. The groups container arranges the properties into collapsible groups displayed in the Inspector of Material Editor. Each property has several attributes including an id, name, type, default value, and a link to a variable in one of the shaders referenced by the .materialtype file.
For this tutorial, we only have one material property: color. To define the color property in the propertyLayout container:
- Define a
settingsproperty group in thegroupscontainer. - Define a
settingsproperty group in thepropertiescontainer to hold details about the properties that belong to the settingspropertygroup. - Define the
colorproperty within thesettingsproperty group insideproperties.
This results in the following example:
    "propertyLayout": {
        "version": 3,
        "groups": [
            {
                "id": "settings",
                "displayName": "Settings"
            }
        ],
        "properties": {
            "settings": [
                {
                    "id": "color",						// Unique, C-style identifier
                    "displayName": "Color",				// Name (appears in the Material Editor)
                    "type": "Color",					// Data type
                    "defaultValue": [ 0.5, 0.0, 0.5 ],	// Default value (depends on data type)
                    "connection": {						// Establish a connection between the property and a variable in the shader.
                        "type": "ShaderInput",			// - Any changes made to this 'color' property serialize to the 'm_unlitColor'
                        "id": "m_unlitColor"            // - variable in the UnlitSingleColor shader.
                    }
                }
            ]
        }
    }
To recap, the above example accomplishes a couple of things:
- Defines the material properties.
- Creates a connection to the variables used by the shader source code (
.azsl). - Sets up the metadata that configures how the material properties appear in the Inspector in Material Editor.
MyUnlitColor.materialtype
Here is the complete MyUnlitColor.materialtype file:
{
    "description": "Renders a model unlit with a single suface color value.",
        "shaders": [
        {
            "file": "./MyUnlitColor.shader"
        },
        {
            "file": "Shaders/Depth/DepthPass.shader"
        },
        {
            "file": "Shaders/Shadow/Shadowmap.shader"
        }
    ],
    "propertyLayout": {
        "version": 3,
        "groups": [
            {
                "id": "settings",
                "displayName": "Settings"
            }
        ],
        "properties": {
            "settings": [
                {
                    "id": "color",
                    "displayName": "Color",
                    "type": "Color",
                    "defaultValue": [ 0.5, 0.0, 0.5 ],
                    "connection": {
                        "type": "ShaderInput",
                        "id": "m_unlitColor"
                    }
                }
            ]
        }
    }
}
5. Compile and debug with the Asset Processor
At this point, we’ve finished writing the files MyUnlitColor.materialtype, MyUnlitColor.shader, and MyUnlitColor.azsl. Now, we are going to make sure they compile successfully.
Asset Processor is responsible for compiling and debugging .material, .materialtype, .shader, and .azsl files (among many other assets). Asset Processor automatically launches when Material Editor is open and runs in the background in the system tray. You can also launch Asset Processor from the directory for your build config such as <build>/bin/profile/ or <install>/bin/<platform>/profile/Default.
Asset Processor monitors your project’s subdirectories and automatically compiles and debugs assets when it detects new or updated files.
If Asset Processor encounters an error, it displays a message above the system tray. To view the results of recently processed jobs, open Asset Processor by choosing its icon in the system tray. You can see the results for the most recent jobs by sorting the Asset Status list by Completed descending.
If a job displays an error or warning, select the job in the Asset Status list and view the log in the Event Log Details list below. The event log will contain verbose information you can use to solve any errors or warnings emitted when specific assets are processed.
6. Create a material using the Material Editor
At this point, all of our files should compile successfully. Now, you are going to create a material based on the MyUnlitColor material type.
To create a new material using Material Editor:
- Launch Material Editor from the directory for your build config such as
<build>/bin/profile/or<install>/bin/<platform>/profile/Default. - From the File menu in Material Editor, select New, or press Ctrl+N to create a new material.
- In the Create New Material dialog, select MyUnlitColor in the Material Type list.
- Choose the folder icon below Select Material Filename. Ensure the file browser has your project’s
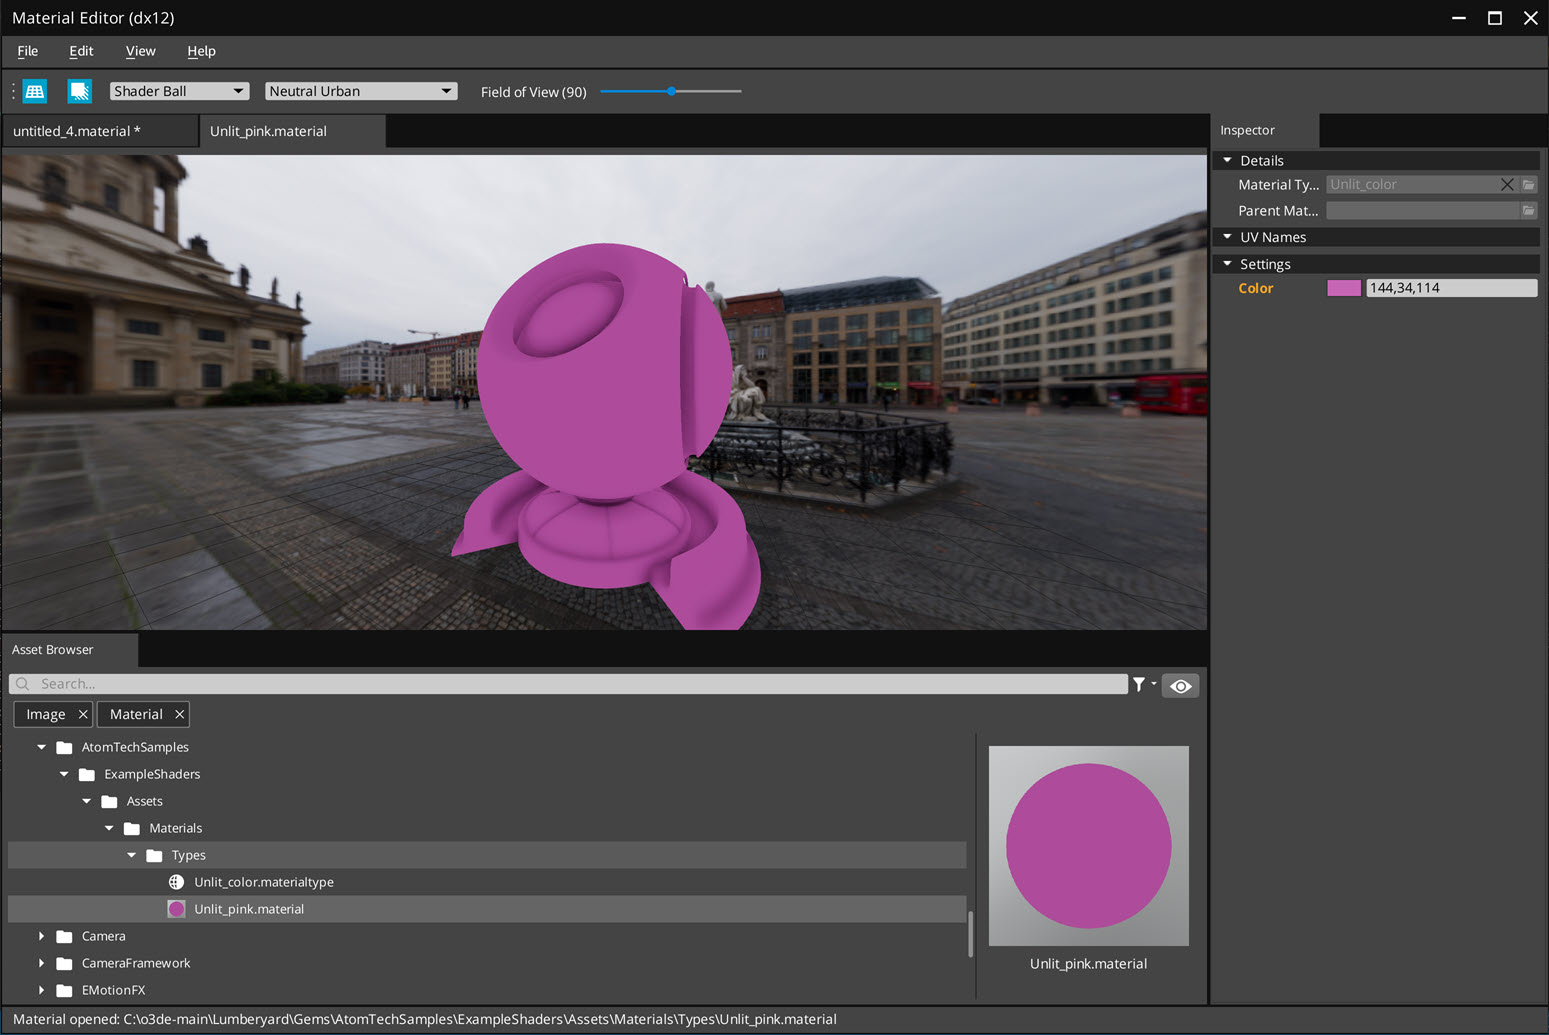
Materialsdirectory selected and name the materialMyUnlitColor.material. Choose OK to close both the file browser and the Create New Material dialog. - The new material is automatically selected in Asset Browser and its settings group and color property are available in Material Editor’s Inspector.
- Change the material color by specifying a comma separated list of RGB values in the Color property field, or choose the color swatch to open the color picker.
- Save changes to the material by choosing Save from the File menu or by pressing Ctrl+S.
That’s it! You created an AZSL shader, a new material type, and a material.
Dive Deeper
Check out the following pages to learn more about materials and shaders in Atom.
- Shader System and AZSL Reference : Learn about the Shader System, including the AZSL language.
- Material System : Learn about the technical details underlying the material system in Atom.