IN THIS ARTICLE
Customize Mesh Asset Processing
This tutorial demonstrates how to customize mesh asset processing for Open 3D Engine (O3DE). You can use any mesh for this tutorial. The primary 3D scene format supported by O3DE is .fbx, so it’s recommended to use a simple mesh asset saved to a .fbx file for this tutorial. If you don’t have your own source asset, you can use one of the assets provided with O3DE.
Preparation
Asset Processor is an application and a service that runs in the background while you use O3DE. Asset Processor automatically detects source assets that are placed in scan directories and schedules process jobs for the found source assets. The process jobs generate product assets that are runtime optimized for O3DE. The end-to-end process from source asset to product asset is the Asset Pipeline. To learn more about Asset Processor and the Asset Pipeline, refer to the Assets topic in the User Guide.
Asset Processor uses scan directories to find assets that need to be processed. Your entire project directory structure is a scan directory. Place your .fbx source asset somewhere in your project, such as the Assets subdirectory, so it can be detected by Asset Processor.
Processing a mesh asset
When you placed your .fbx source asset in your project, Asset Processor detected the asset and processed it with a default set of rules for .fbx source assets. To customize the rules that process a mesh asset, follow the steps below:
In O3DE Editor locate your asset in Asset Browser. If you don’t have an asset of your own, you can type
fbxinto the search field at the top of asset browser and use one of the provided.fbxfiles such assphere.fbx.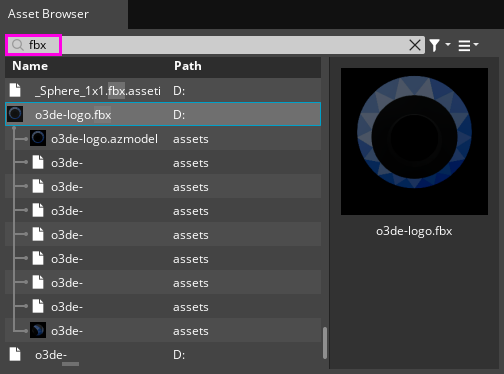
If your asset has already been processed, you might see a preview image of the asset, and a list of product assets below the
.fbxsource asset.Right-click the
.fbxsource asset and choose Edit Settings… from the context menu to open Scene Settings.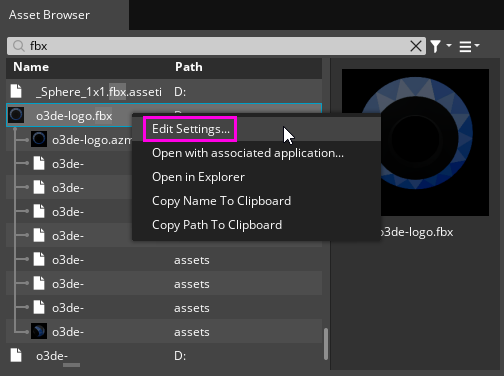
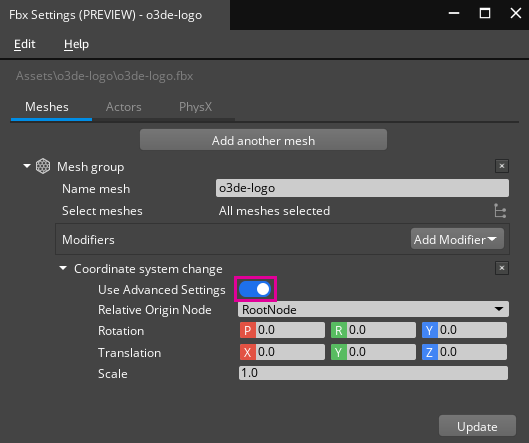
The Scene Settings window presents different tabs depending on the contents of the source asset file. Make sure the Meshes tab is selected.
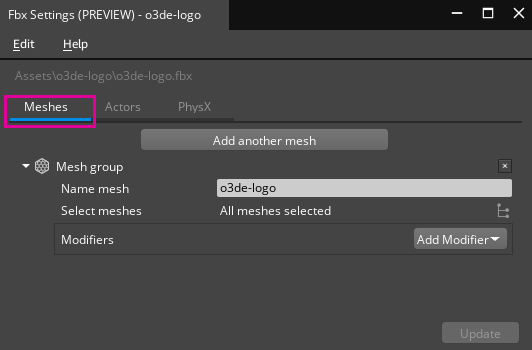
In the image above, there is a single Mesh group. By default, all the meshes in a source asset are processed as a single mesh group. Each mesh group produces a set of product assets. You can create additional mesh groups for a source asset by choosing Add another mesh.
The Name mesh property contains the name of the source asset. All product assets of this mesh group use this string as a prefix for their name. When there are multiple mesh groups, the product assets appear in Asset Browser beneath the source asset and are organized by mesh group name.
The Select meshes property reads All meshes selected. You can choose the
 file select button to select which meshes to include in the mesh group.
For this tutorial, you can use the default mesh group with all meshes selected.
The customizations you make in Scene Settings are stored in a sidecar file with a
.assetinfoextension. When Asset Processor detects a.assetinfofile, it uses the settings in the file to process the related source asset. This sidecar file is treated as a source dependency for the asset. This means that if the.assetinfofile is changed, the source asset will be reprocessed even if the source asset has not changed.Let’s add a modifier to customize how the asset is processed. Choose the Add Modifier button to view the mesh modifier list and select Coordinate system change.
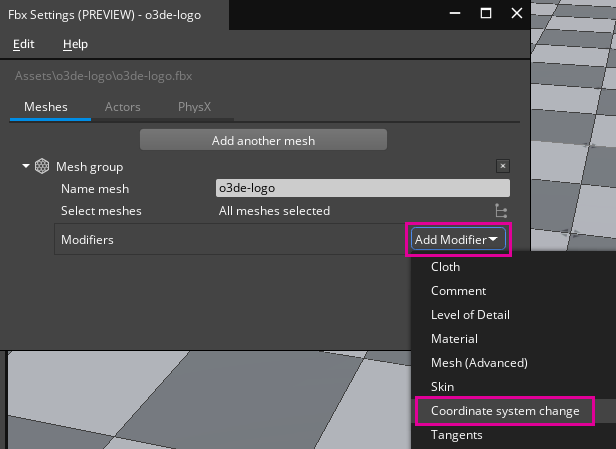
The Coordinate system change mesh modifier is used to scale or transform the asset for those scenarios where the asset might be too small, too large, or incorrectly oriented in O3DE. By default, the modifier provides a single option to rotate the mesh 180 degrees. Activate the Use advanced settings toggle to expose the advanced modifier settings.
Let’s customize the scale of the asset. Set the Scale property to
5.0to scale the asset to five times its size.Note:You can learn about the advanced settings properties of the Coordinate system change modifier, as well as the other available modifiers and their properties, in the Scene Settings topic of the User Guide.Choose the Update button at the bottom-right of Scene Settings. This creates or updates the
.assetinfosidecar file and triggers Asset Processor to reprocess the asset.Drag the
.azmodelproduct asset from Asset Browser into the viewport.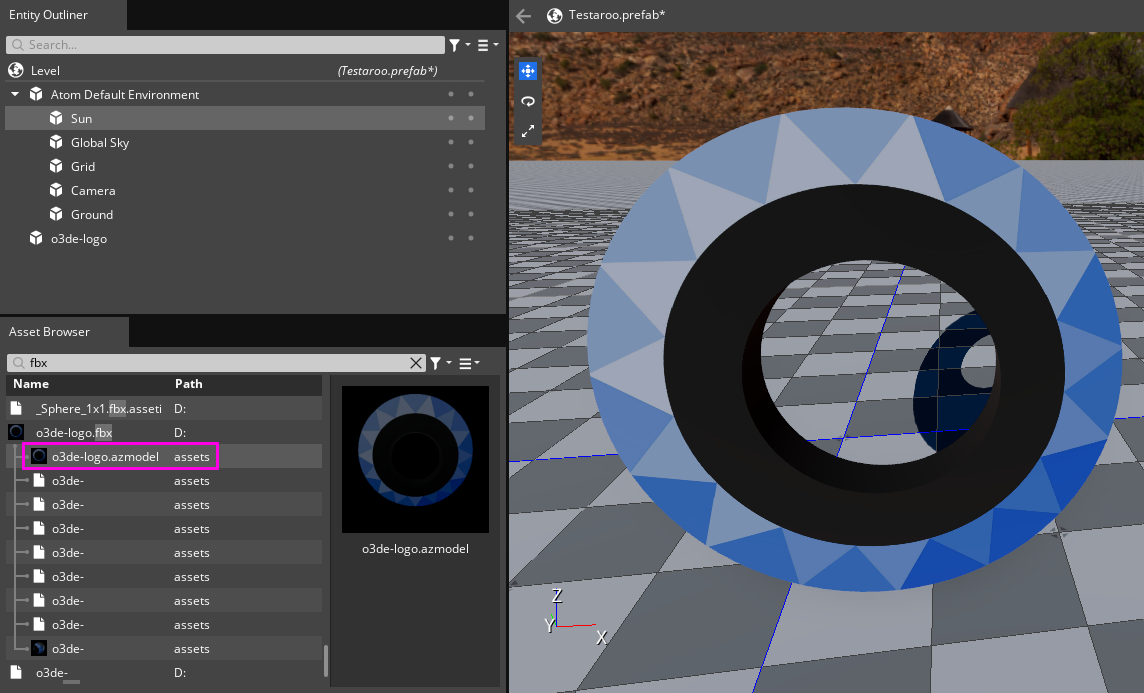
When you drag the asset into the viewport, O3DE automatically creates an entity with a Mesh component that references the mesh product asset. If the source asset contains materials that have been processed, the materials are applied to the mesh by default.
There are many options for customizing mesh processing, but there are limitations to the data that can be processed for meshes. Note that there are several product assets generated for the mesh that are listed below the source asset in Asset Browser. Each of these product assets contains some stream of data for the mesh. To learn more about the data that can be processed for a mesh and the limitations on the data that can be processed, refer to 3D Scene Format Support in the User Guide.