IN THIS ARTICLE
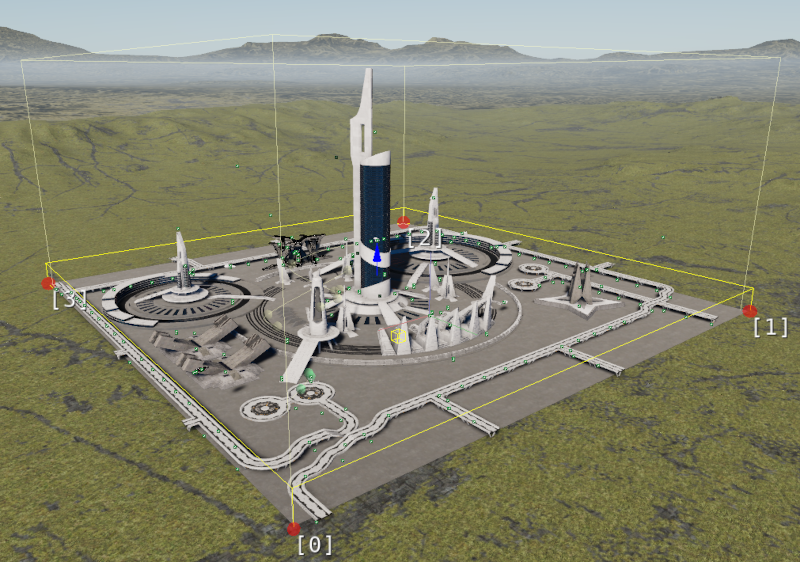
Kythera City Level Overview
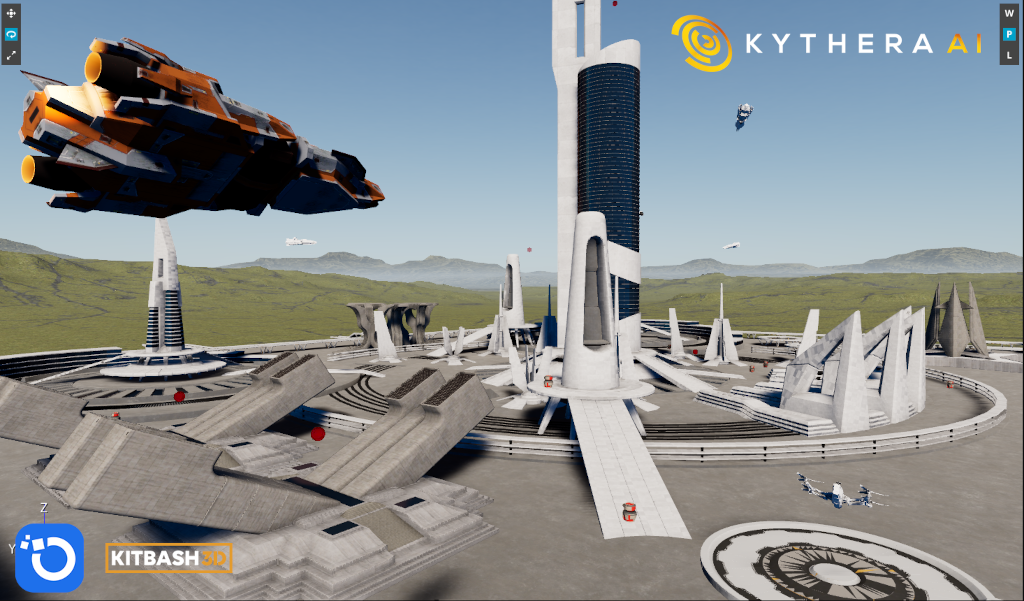
The KytheraCity level demonstrates basic setup examples for several features of the Kythera AI Gem in Open 3D Engine (O3DE) [Developer Preview]. These features include:
- 2D navmesh generation and customizability
- 3D octree generation and customizability
- The
Kythera AI Inspector
tool, which includes:
- Behavior tree editing
- Debug drawing
- 2D pathfinding
- 3D pathfinding
- 3D splines and orientation
Kythera actors
When you open the level, note first that the level actors are split into prefabs.
This document provides an overview of the entities and actors within KytheraActors.prefab.
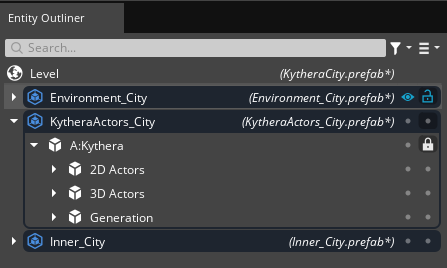
KytheraActors_City.prefab is located in the KytheraAIDemo/Prefabs folder and must be saved manually. To save it, right-click on the shaded part of the prefab in the Entity Outliner, and then click Save prefab to file.
KytheraActors_City is split into three parent entities that serve as a container to keep entities organized:
- Generation
- Contains the
Navmesh Boundsentity - Contains the
3DOctreeentity
- Contains the
- 2D Actors
- Contains
Robot.prefabs for 2D navigation
- Contains
- 3D Actors
- Contains three more parent entities:
- 3D POIs (points of interest)
- 3D ships
- KytSpaceship
- KytSpaceship_Splines
- KytDrone_Splines
- 3D Splines
- Contains Kyt_Spline(s)
- Contains three more parent entities:
2D navmesh generation and customizability
When you open the level for the first time, you will need to regenerate and save the navmesh before you can simulate the AI.
To regenerate and debug the navmesh:
- In the Kythera Toolbar, set the navmesh select to
Basic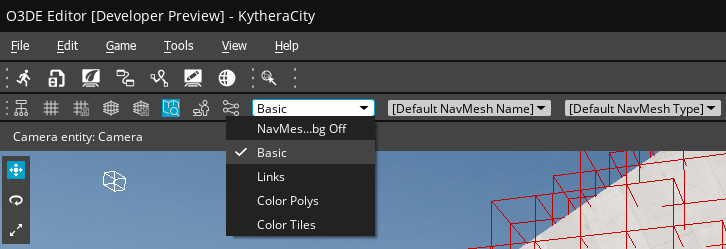
- To generate the navmesh, click the Regenerate Navmesh icon in the Kythera Toolbar

- Then save the navmesh to a file using the Save icon in the Kythera Toolbar

The NavMesh Bounds component comes with a Polygon Prism Shape component when you first add it, to help you scale the shape to your level’s requirements in edit mode.
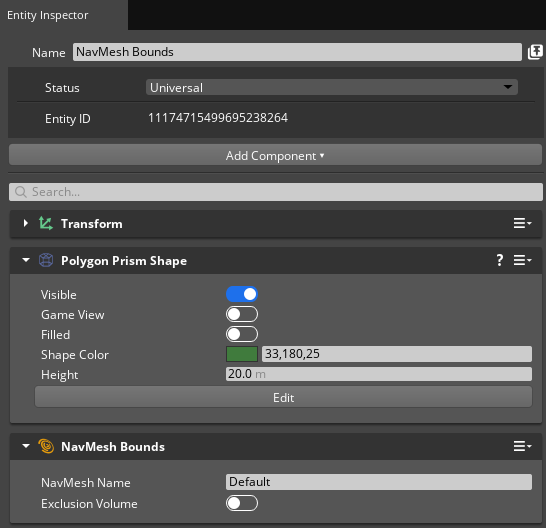
- Click and drag the red points to move them
- Ctrl+Click on the line to add new points (Ctrl+Click on the red points after previously selecting another point to select multiple points at once).
The navmesh name we’re using in this level is Default, and the properties and parameters of the navmesh can be found and modified in KytheraAIDemo/Scripts/navmesh.xml.
Navmesh.xml is customized to be consistent with the Robot.prefab (KytRobot) entity that contains the
PhysX character controller for accurate obstacle avoidance and slope transitioning.
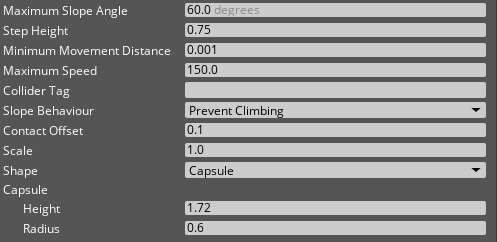
<AgentHeight type="float">1.720000</AgentHeight>
<AgentMaxClimb type="float">0.750000</AgentMaxClimb>
<AgentMaxSlope type="float">60.000000</AgentMaxSlope>
<AgentRadius type="float">0.600000</AgentRadius>
AgentHeight= Capsule heightAgentMaxClimb= Step heightAgentMaxSlope= Maximum slope angleAgentRadius= Capsule radius
3D octree generation & customizability
Like the Navmesh Bounds component, the Octree component comes with a Polygon Prism Shape component.
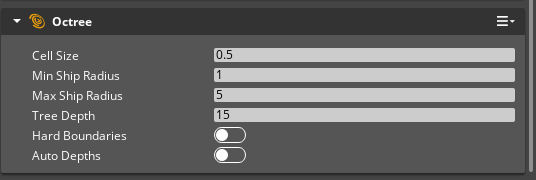
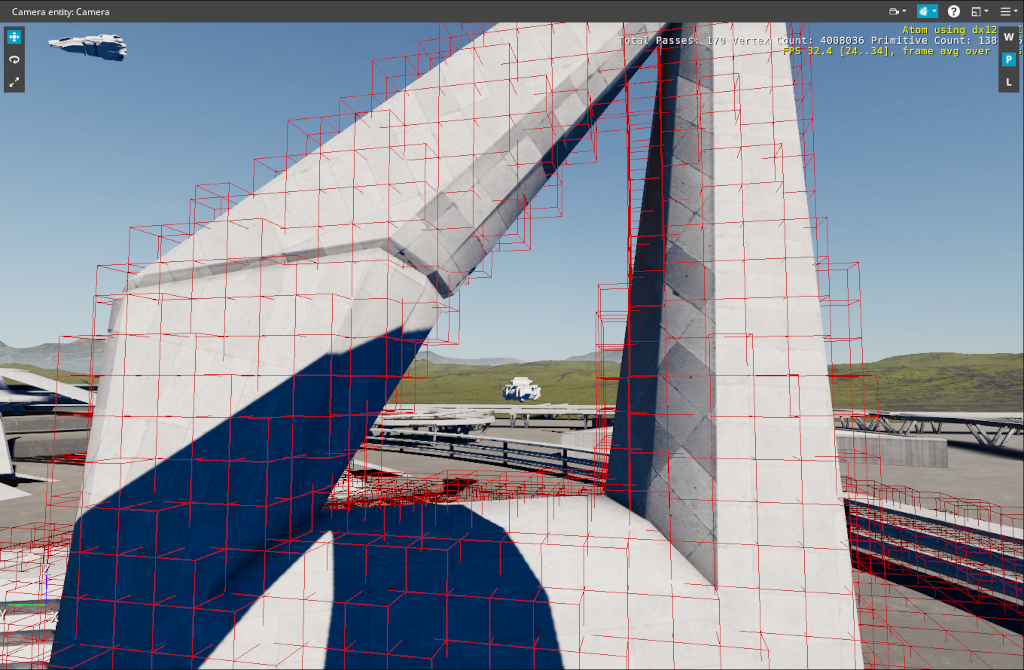
The 3DOctree entity’s Octree component is configured for accuracy at the cost of some performance, using a small cell size to represent the complex geometry of the level.
- To generate the octree use the Generate Octree icon on the Kythera AI Toolbar,
then make sure to save the octree using the Save Octree button

- To show debug draw for the Octree, enter the following commands in the O3DE console:
kyt_drawmaster 1kyt_drawnavoctree 2

Kythera AI Inspector tool (behavior trees and debug draw)
The Kythera AI Inspector is a web-based tool that allows you to author behavior trees (BTs) and access advanced debug draw features. To launch the Kythera AI Inspector, click on the Launch Inspector icon in the Kythera Toolbar.
By default, the Inspector will show the blackboard view, where you can debug existing blackboard values, and enable or disable the debug draw options.
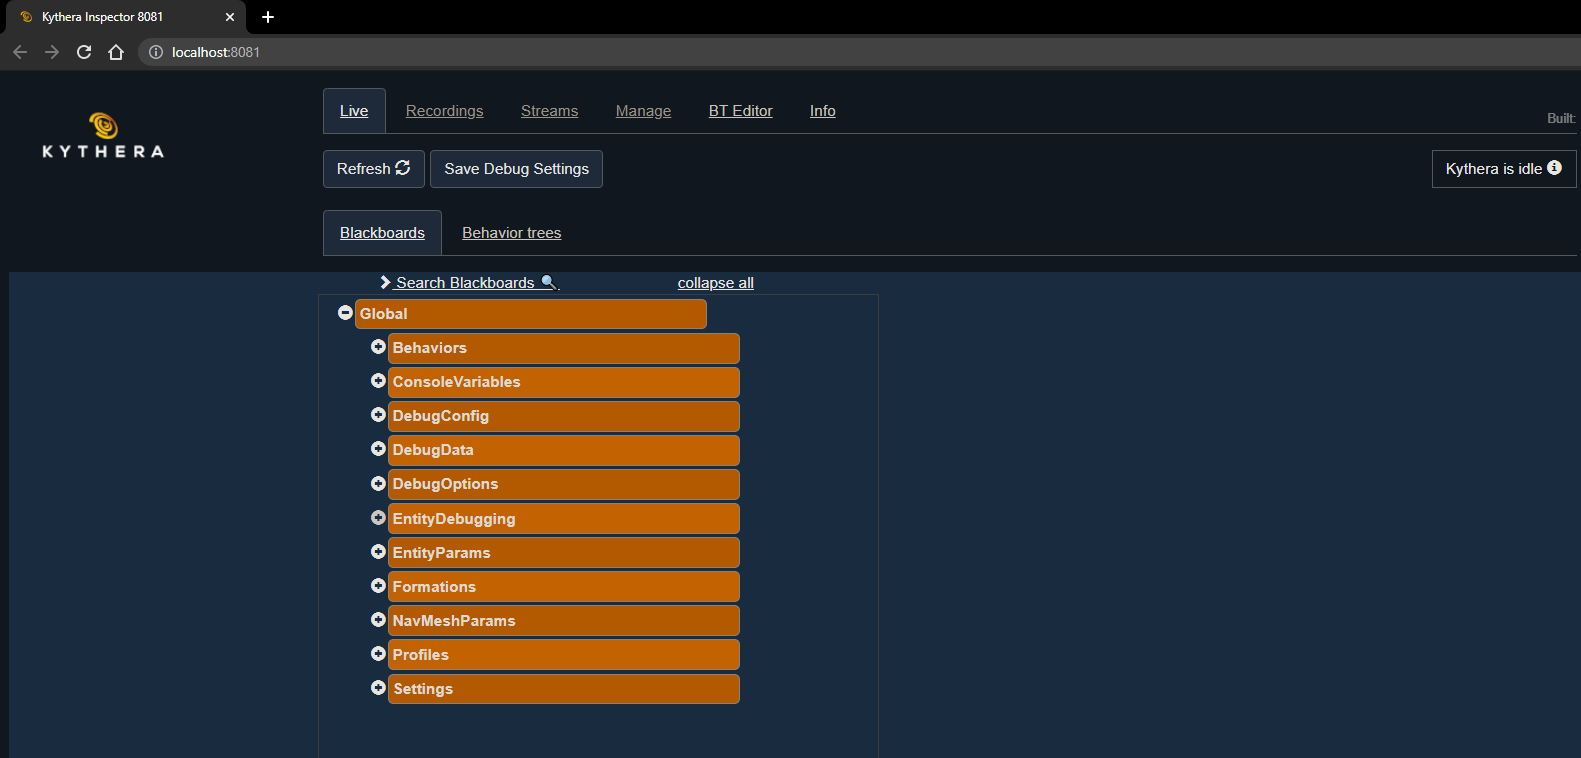
To enable debug draw, expand Console Variables or drag it to the side to create a new tab.
Set console variable Draw Master to 1 and collapse console variables.
Expand debug options, here you can disable/enable various specific debug draw features.
To view the behavior trees, click on BT Editor at the top of the page and select a behavior tree name to edit. Make sure that the game or O3DE Editor isn’t playing or simulating while editing the behavior trees.
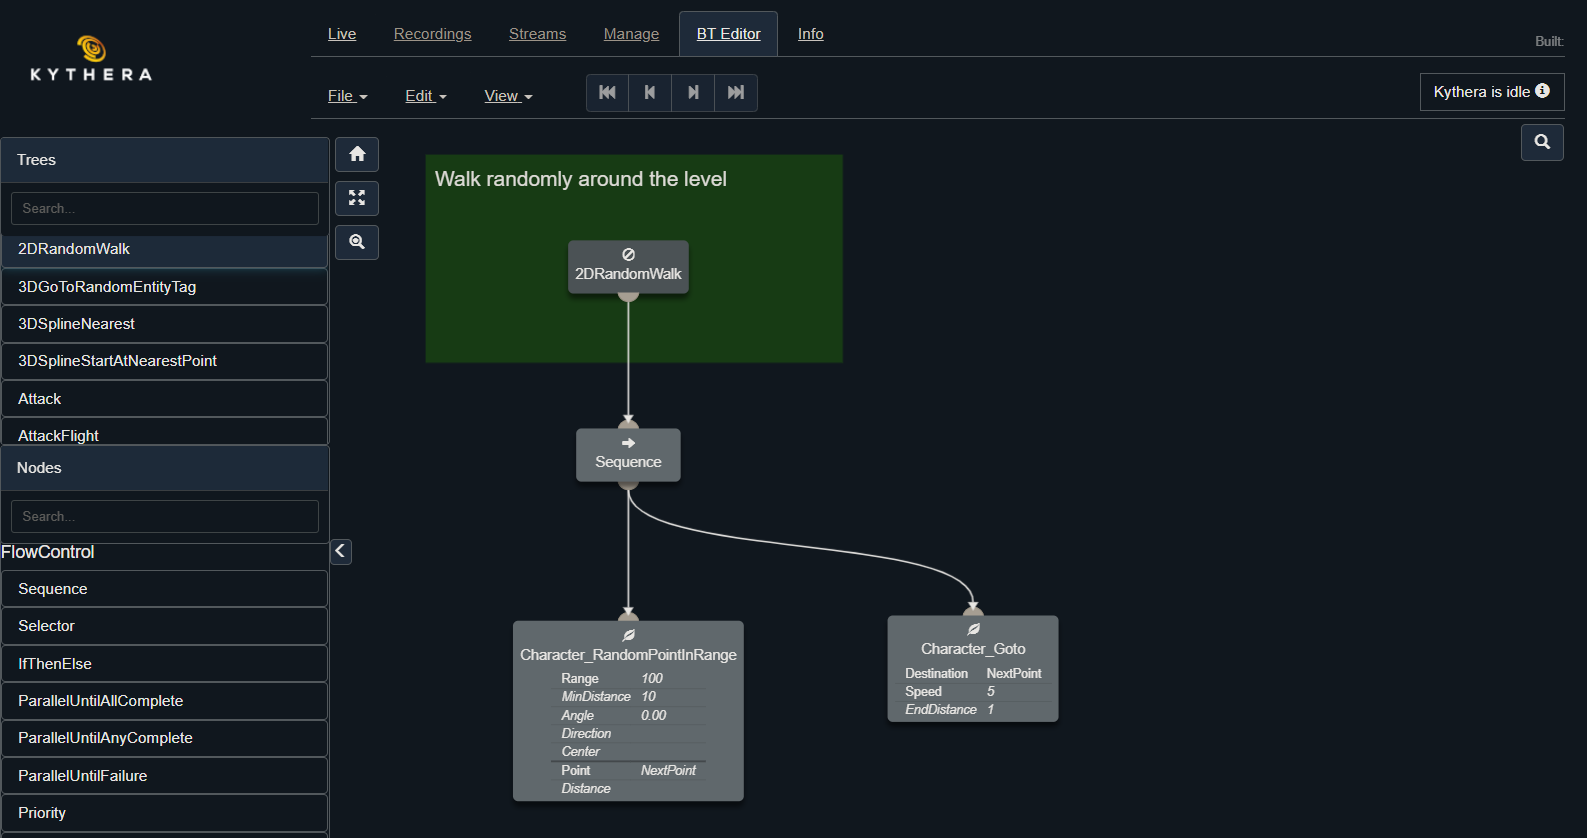
Alternatively, you can view the behavior in live mode, go to:
- In the top menu bar choose the
Livetab, then theBehavior treestab below it - Simulate or play the level in O3DE Editor. The Inspector shows
Kythera is active. - Find an entity in the dropdown menu to see which behavior tree is in use.
- Click the
Livebutton to the right of the dropdown menu to view the behavior tree in real time
2D pathfinding
2D Navigation is demonstrated by the Robot.prefab. The robots use the behavior 2DRandomWalk, which chooses a random point in a specified range, then finds and follows a path to that point.
When duplicating or moving entities, be sure to select the top (shaded tab) of the prefab in the Entity Outliner, to prevent detached objects in the level.
The KytRobot entity in the prefab has the following components, which are required for 2D navigation:
KytheraPhysX Character Controller, set to be consistent withnavmesh.xmlAgent, set to use the profileRandomWalkSimpleMovementControllerTheRandomWalkprofile can be found inKytheraAIDemo/Scripts/Profiles.xml:
<RandomWalk id="140" inheritanceParent="100" type="bb">
  <DefaultBehavior type="string">2DRandomWalk</DefaultBehavior>
</RandomWalk>
The DefaultBehavior name must match the behavior name set in the inspector.
3D pathfinding
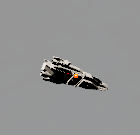
3D Pathfinding is demonstrated by KytSpacship entities within the level.
The KytSpaceship entities use the behavior tree 3DGoToRandomEntityTag, which searches for a random entity with a Kythera AI tag of Kyt_Point_of_interest, then finds and follows a path to that entity.
You can find the Kythera3D_Point_of_Interest_Tagged entities in the outliner, which contains a Kythera component with an added tag of Kyt_Point_of_interest.

The octree must be built and present in the level for 3D navigation behavior tree nodes to work.
The KytSpaceship entity has the following components, which are required for 3D navigation:
KytheraPhysX Collider, set to the convex shape of the shipAgent, set to use the profileGoToRandomEntityProfileFlightMovementController, which you can configure to change the speed and acceleration of the shipsPhysX Rigid Body(required by the movement controller)
You can find the profile GoToRandomEntityProfile in KytheraAIDemo/Scripts/Profiles.xml.
<GoToRandomEntityProfile id="210" inheritanceParent="200" type="bb">
  <DefaultBehavior type="string">3DGoToRandomEntityTag</DefaultBehavior>
</GoToRandomEntityProfile>
The DefaultBehavior name must match the behavior name set in the inspector.
3D splines and orientation
The level demonstrates 3D splines using a few entities.
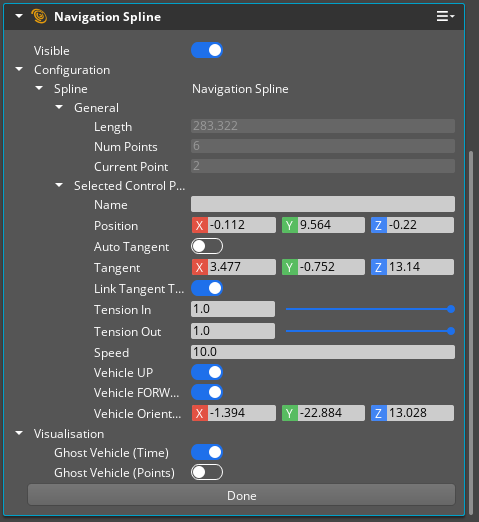
The level contains a couple of Kyt_Spline actor entities that are set up with a Navigation Spline component. The parameters of this component change the physics behavior of agents flying the spline.
In the above screenshot, the spline is shown using the “Ghost Vehicle” visualization, which shows the expected physical behavior for agents following the spline, including orientation and speed. (The further apart the ghost vehicles appear, the faster the agents travel.)
The KytSpaceship_Splines entity has the following components, which are required for 3D navigation:
KytheraPhysX Collider, set to the convex shape of the shipAgent, set to use the profilePathToNearestSplineStartFlightMovementController, which you can configure to change the speed and acceleration of the shipsPhysX Rigid Body(required by the movement controller)
The KytDrone_Splines entity is set up in almost exactly the same way as the KytSpaceshp_Splines, except that its Agent component is set to use the profile PathToNearestSplinePoint.
The following debug draw features, which you can set from the Kythera AI Inspector, are useful for debugging 3D navigation:
ConsoleVariables/DrawMaster 1ConsoleVariables/DrawOctree 2Debug Options/SplinesDebug Options/3D PathDebug Options/VelocityDebug Options/SpeedDebug Options/Steering Path